Time Tracking Tab Overview
Easily manage employee attendance with the use of Time Tracking feature. The tool allows you and your colleagues to define the expected working hours for each employee, track actual working hours with ease, monitor the total time spent working each day, and finally, generate accurate and detailed timesheets for all employees.
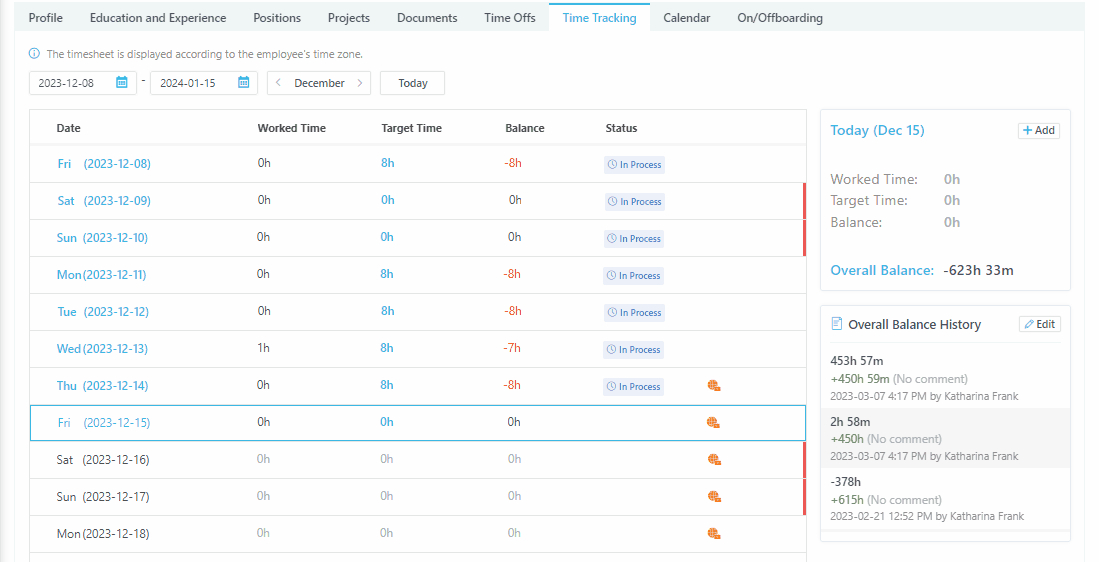
Get the pulse of your team's time investment with the Time Tracking tab. Its intuitive table provides instant access to each member's timesheet data. The Tracking Time Schedule offers a separate window that summarizes the overall workload and progress.
Important: Ensure that you and your coworkers have permissions in the Roles and Permissions section of Settings.
Timesheet Details
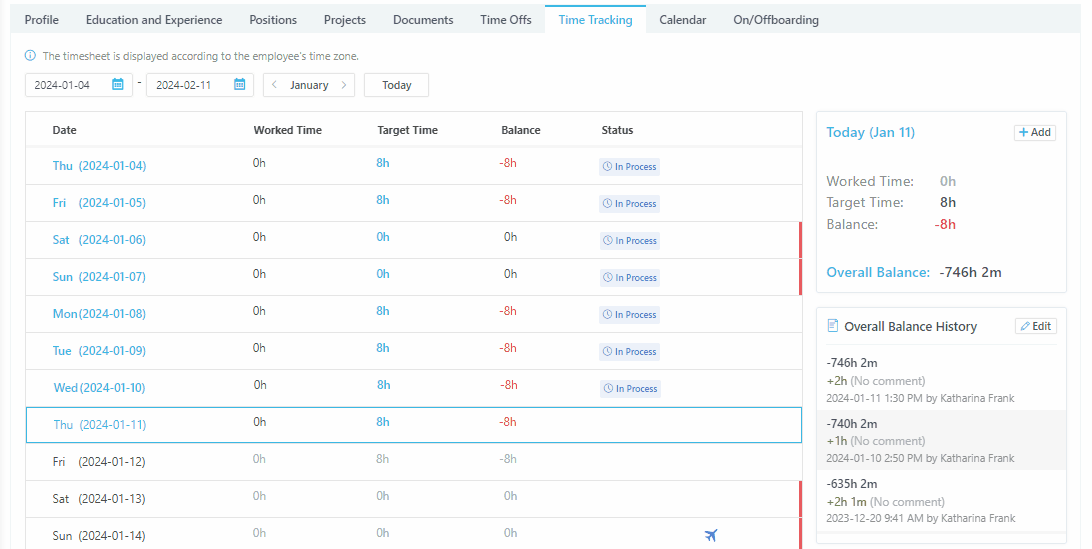
- Date: This column displays the specific date for each entry in the table;
- Worked Time: This column shows the total amount of time the employee spent working on that specific date;
- Target Time: This column displays the predefined working hours expected from the employee for that specific date;
- Balance: This column indicates the difference between the Target Time and the Worked Time. A positive value indicates exceeding the target, while a negative value indicates falling short;
- Status: This column reflects the current approval status of the timesheet for that specific date:
- In Process: The timesheet has been submitted but not yet reviewed or approved;
- Approved: The timesheet has been reviewed and verified as accurate;
- Rejected: The timesheet has been reviewed and rejected.
Every row displays a specific date, and dates are grouped by color-coded periods based on your approval template. This helps you see your schedule at both the daily and periodic levels.
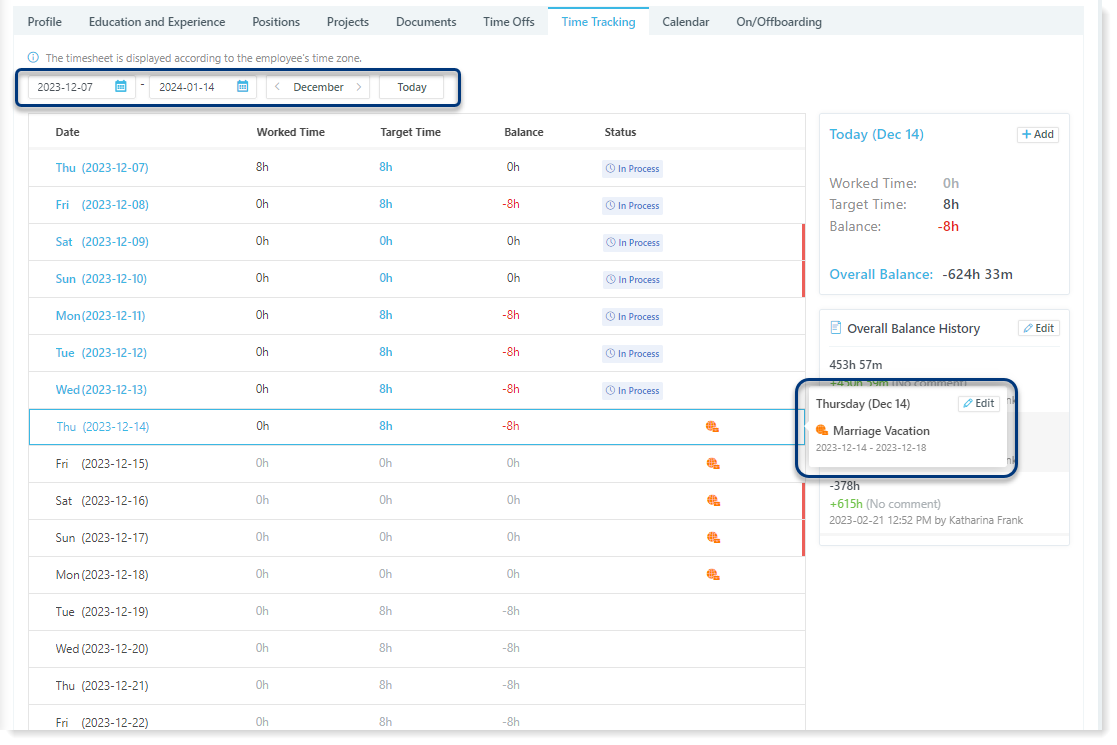
Customize the period displayed using the filters provided above the table. Choose specific dates or easily navigate through months with the arrow buttons. You can also see your current month's progress by clicking Today.
Tip: Hover your mouse over any day on the table for a quick peek into your schedule. This handy tooltip reveals:
- Day of the Week: Stay organized and aware of your weekly rhythm;
- Total Worked Hours: See the summary of your logged hours;
- Vacation Type: All your vacation days are visible;
- Edit Button: Click the Edit button to adjust your schedule.
Tracking Time Schedule
Track your time and stay on top of your schedule with ease!
- Today: Track your worked hours, compare them to your target goals, and stay on top of your daily workload with the balance indicator;
- Period: Analyze your work patterns by choosing a specific timeframe (daily, weekly, monthly, etc.);
- Overall Balance: Keep track of your total time balance since your first day;
- Overall Balance History: Explore the detailed history of your overall balance, revealing every manual adjustment, the date, and who made it:
- Regularly review your Overall Balance History to stay on top of your time management!
Customizing Your Target Working Hours
Tip: The system displays the daily value specified in the Positions section of the employee profile as a target time for working days.
To customize this target:
- Click on the specific value in the row, prompting a field to enter new hours and minutes;
- Enter your new target time and click Save to confirm, or Cancel to keep the current value.
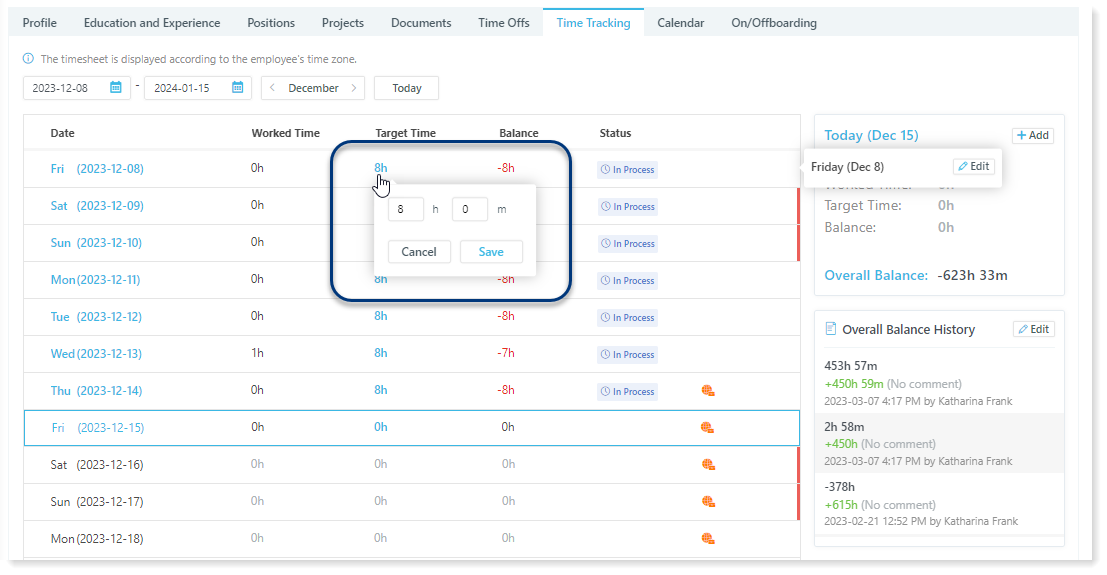
Note: Please note that the system currently doesn't set a target time for weekend days, but you can manually add these if needed.
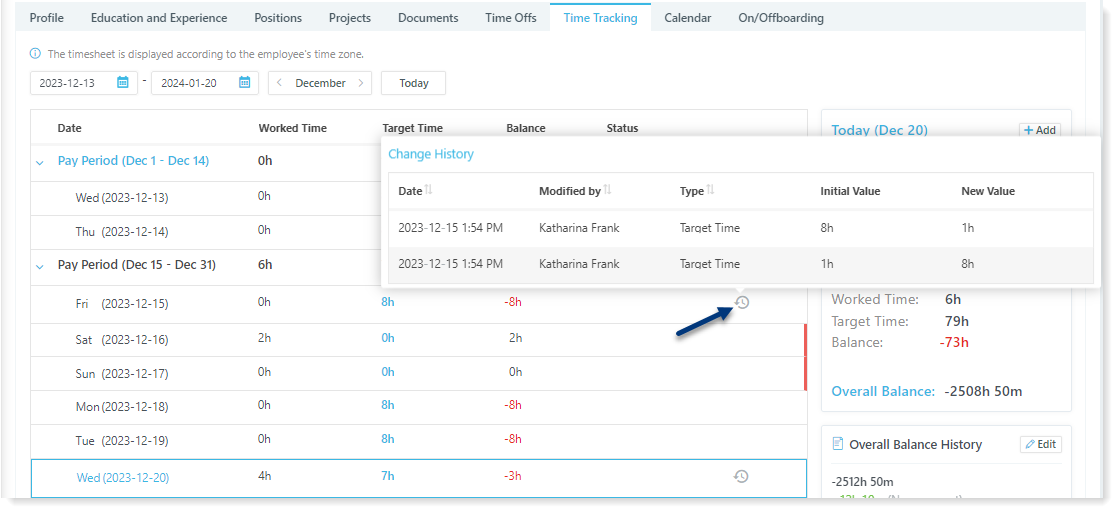
Tip: Uncover the story behind your time entries! Click the History icon to unlock a detailed log of corrections. Get the full picture of value changes, responsible users, and when they occurred.
Add and Edit Working Hours
To Add/Edit the Working Hours:
- Click the + Add button within the Tracking Time Schedule window to input hours or select a specific date row to edit existing hours;
- Enter the exact period you worked, e.g. 13:00 to 14:00;
- Click Save to confirm the new entry or Cancel to discard the changes.
Making Corrections in Time Tracking
To Edit the Overall Balance History follow these simple steps:
- Click on the Edit button;
- Select whether you want to add or subtract time from the existing entry;
- Enter the exact amount of time you're adjusting, using hours and minutes;
- For Optional Comments you can provide additional details if needed to explain the correction;
- Click the Save button to apply your correction, or click the Cancel button to discard any changes and keep the original entry intact.