Working with Candidates
To get started with the recruitment process with a specific candidate you can click on the stage s/he is currently in or by going to the recruitment records from his/her profile.
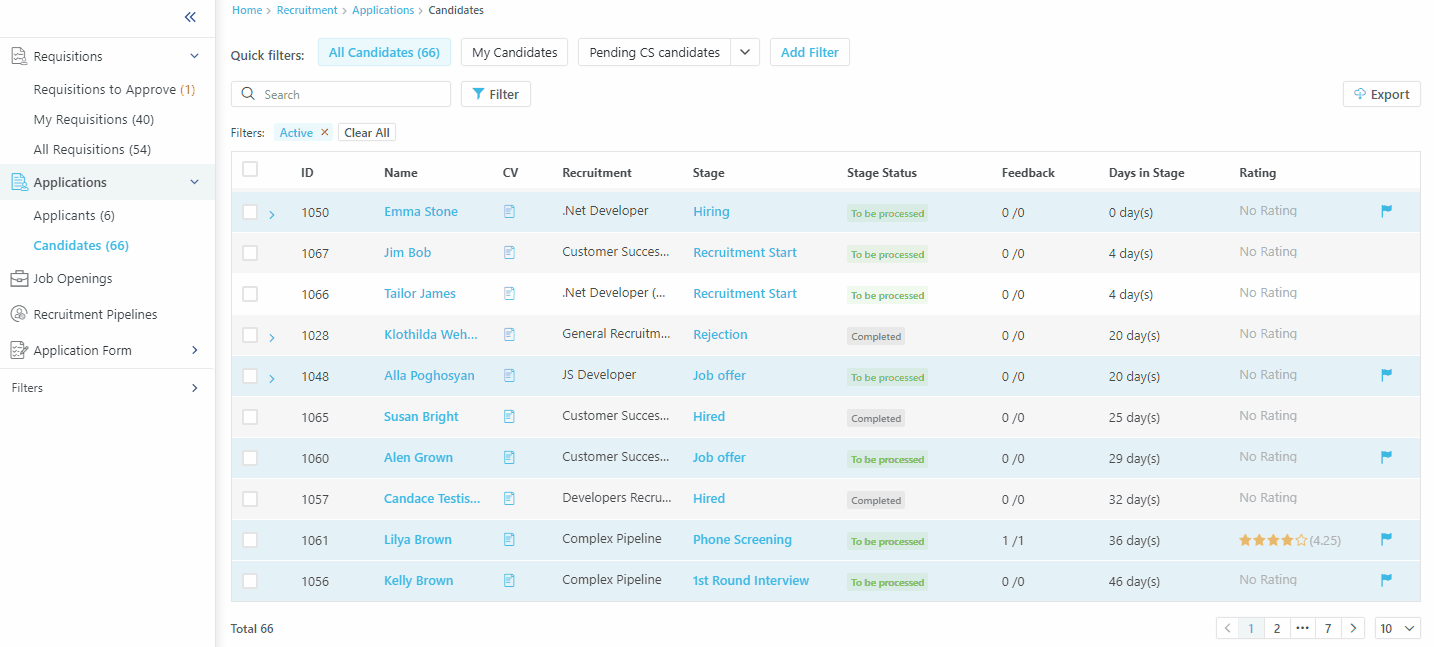
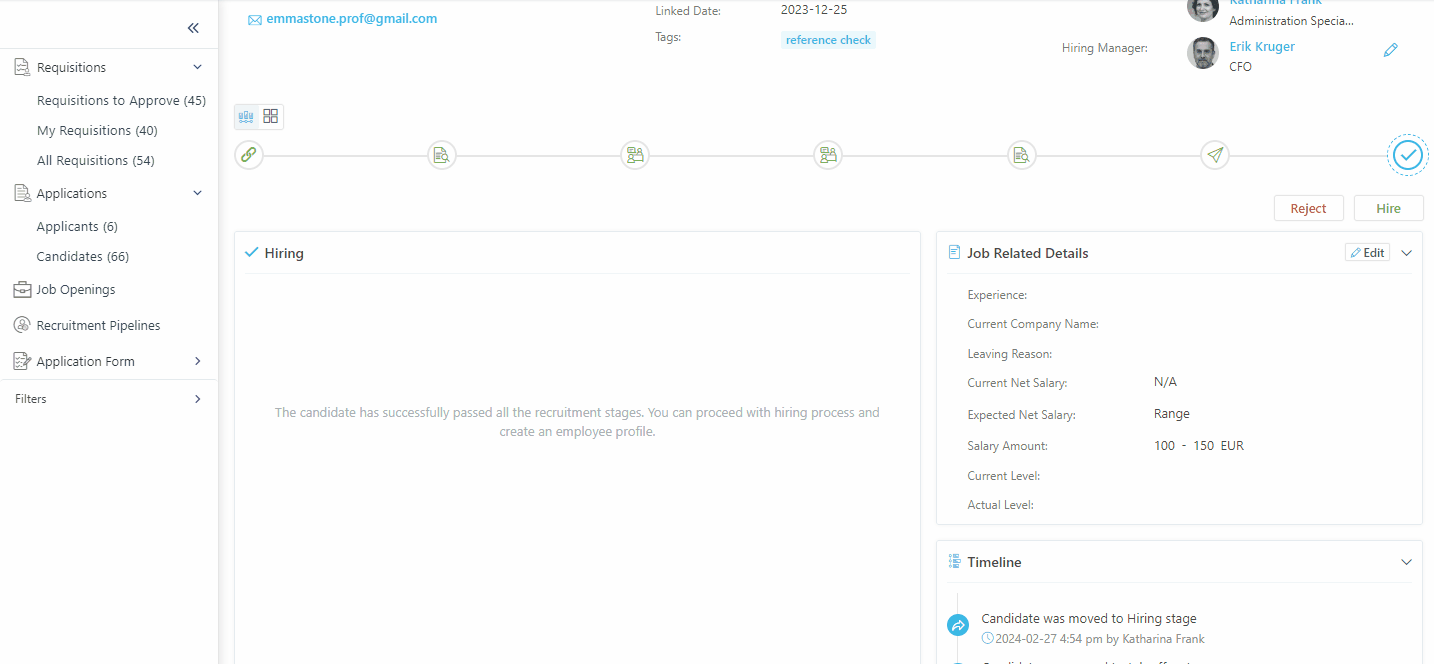
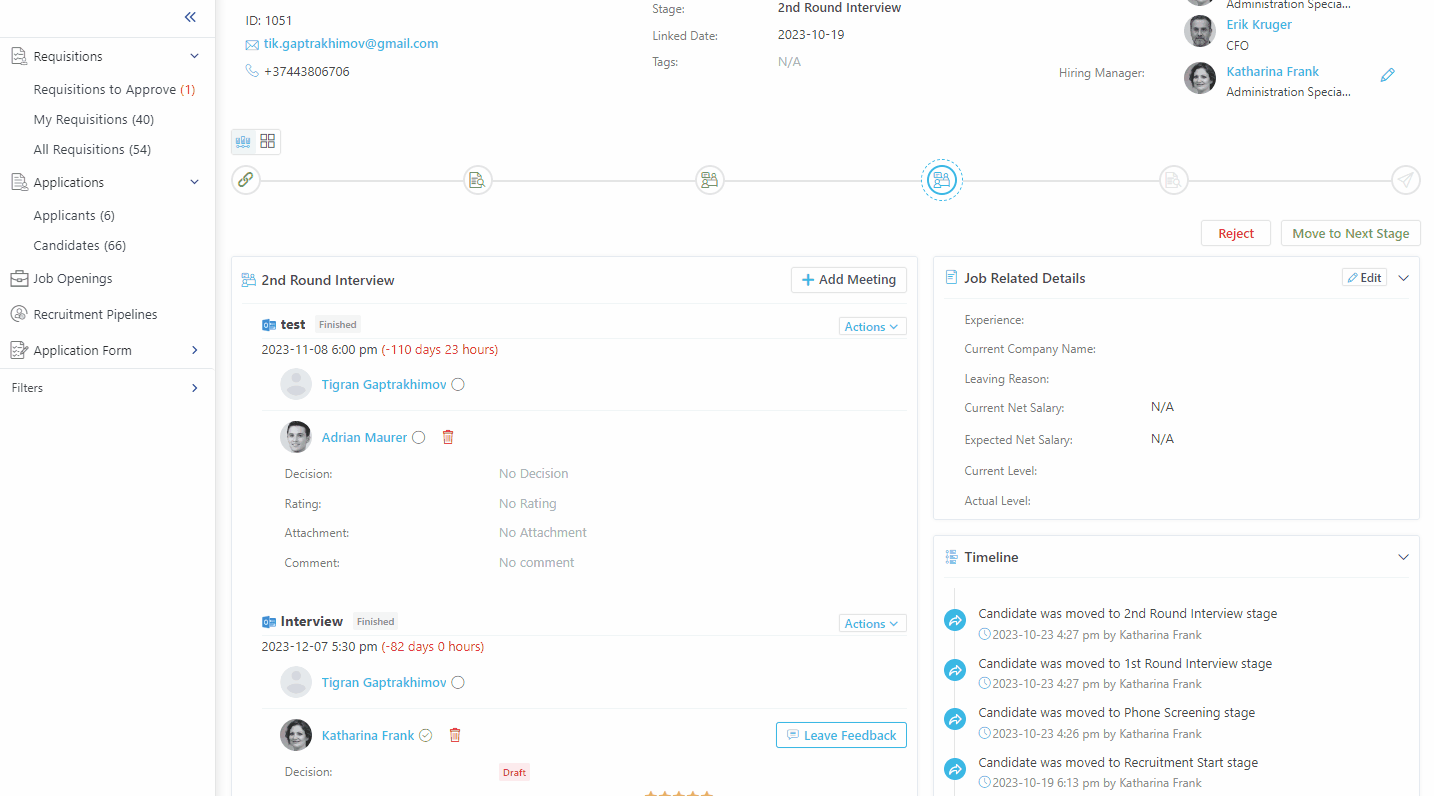
You can view the candidate's full name, ID, CV, Recruitment pipeline and current stage s/he is in, the date when the candidate was linked to this recruitment and also see/add tags. Right within this page you can also make any changes to the hiring team.
Depending on the stage you can perform different actions with the candidate, like:
- Update Job Related Details: just click the Edit button to make any modifications
- View the Timeline: here you will see any actions that have been performed on the candidate by the hiring team, from linking to recruitment to hiring/rejecting him/her
- View and add public or private Notes to the candidate's profile
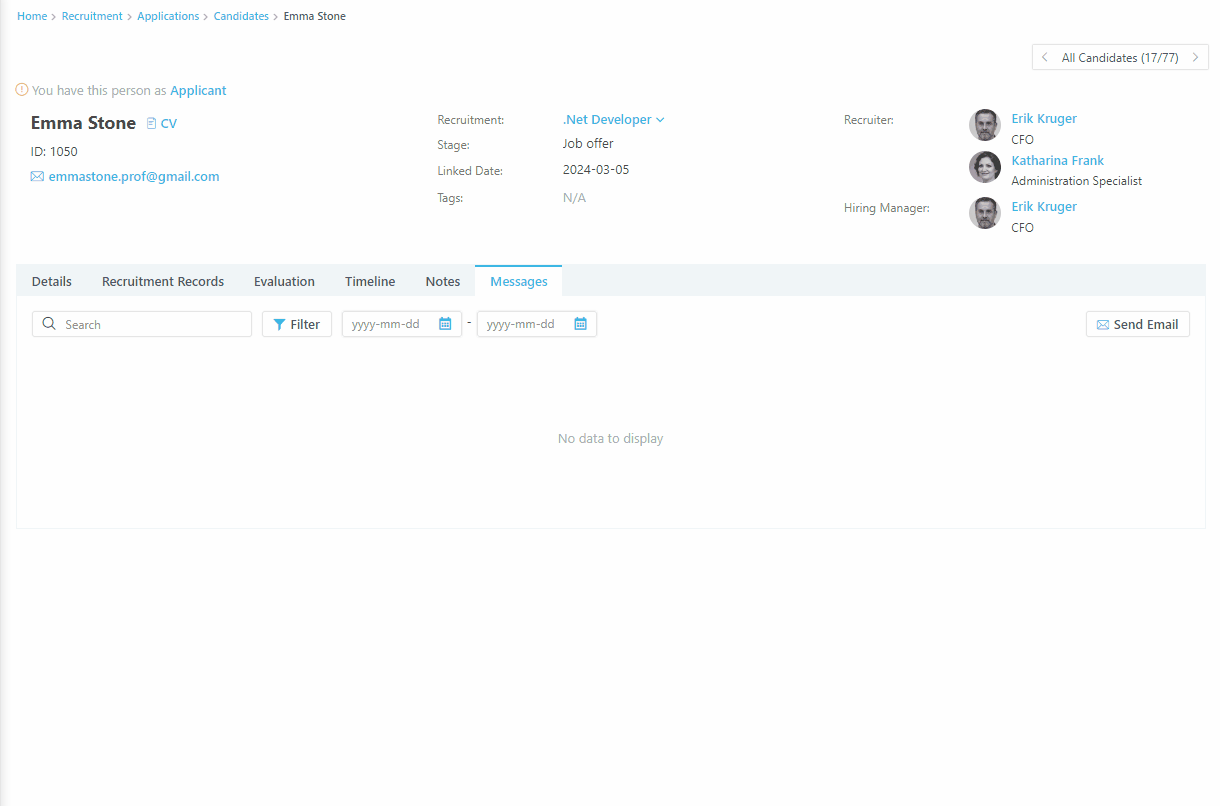
- View the Messages field, that is see any correspondence between the candidate and hiring team as well as send new messages
Tip: You can unlink the candidate from recruitment (specific pipeline or job opening) while s/he is in the Recruitment Start stage.
To move the candidate to the next stage click the Move to Next Stage button.
Creating Assessments and Their Purpose
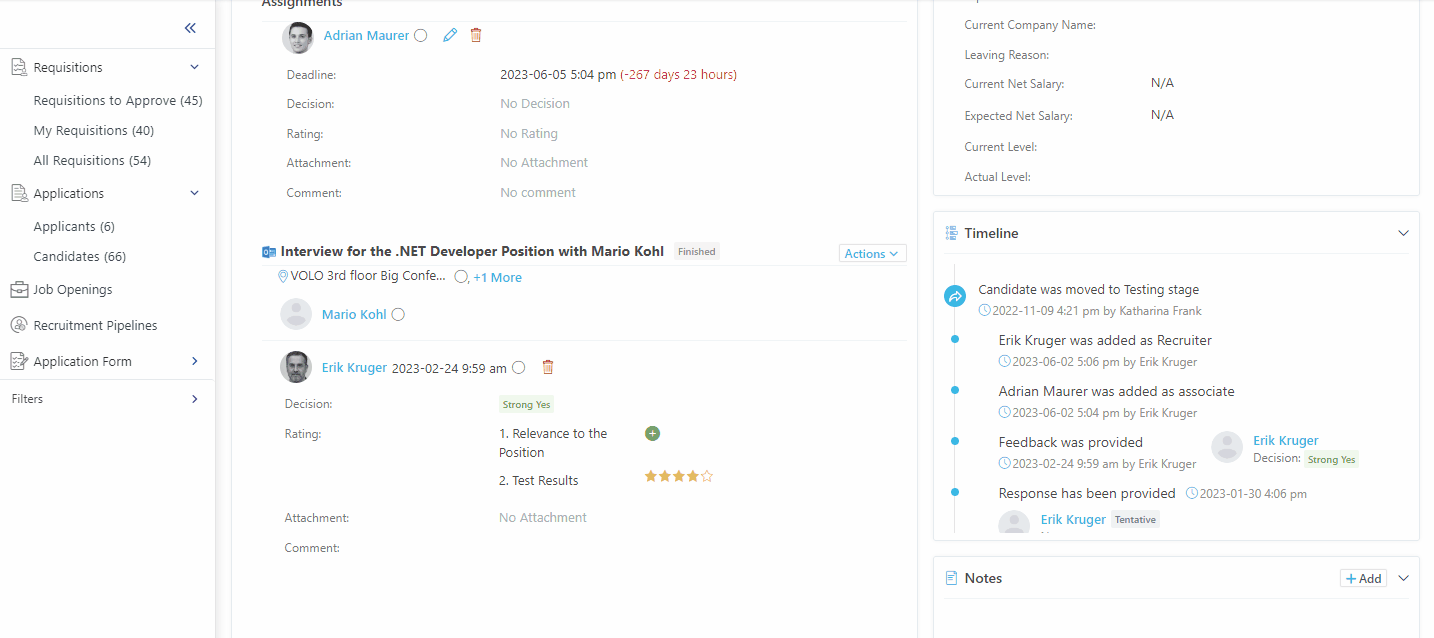
Depending on the next stage type you will be able to add assessments for the hiring team. To add an assessment perform these steps:
- Click the + Add Assessment button
- Select the associates that should complete the assessment by leaving feedback and evaluating the candidate
- Specify the Deadline by entering the date and time
- Click Save once finished
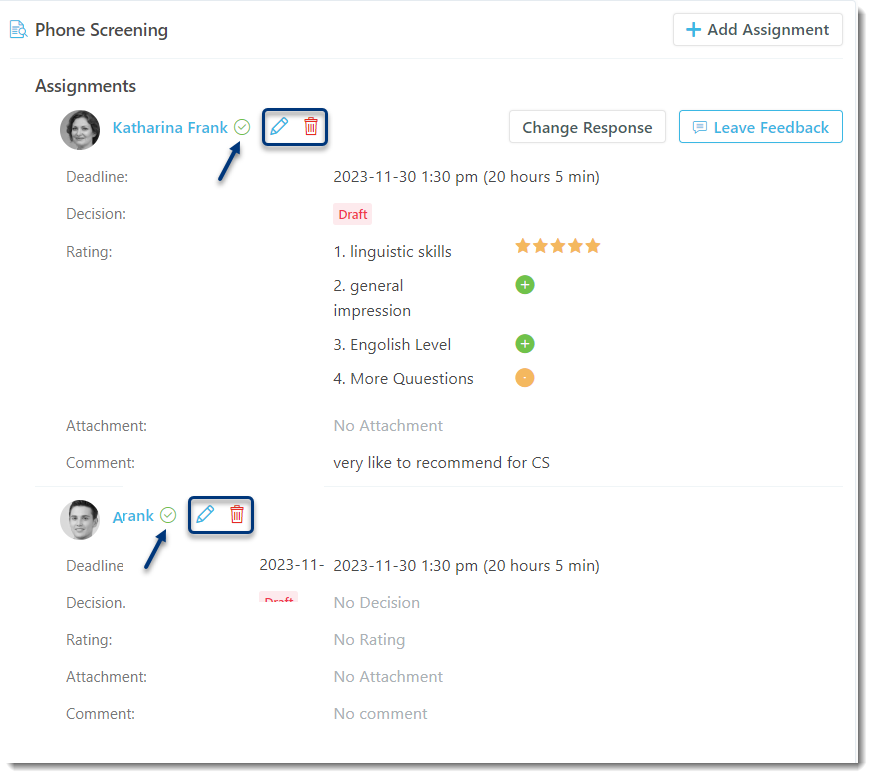
Once the Assessment is created you (as one of the hiring team members) will have access to complete it for yourself by clicking the Leave Feedback button. Depending on the recruitment pipeline configurations you will be able to evaluate the candidate and leave a comment as well as upload attachments.
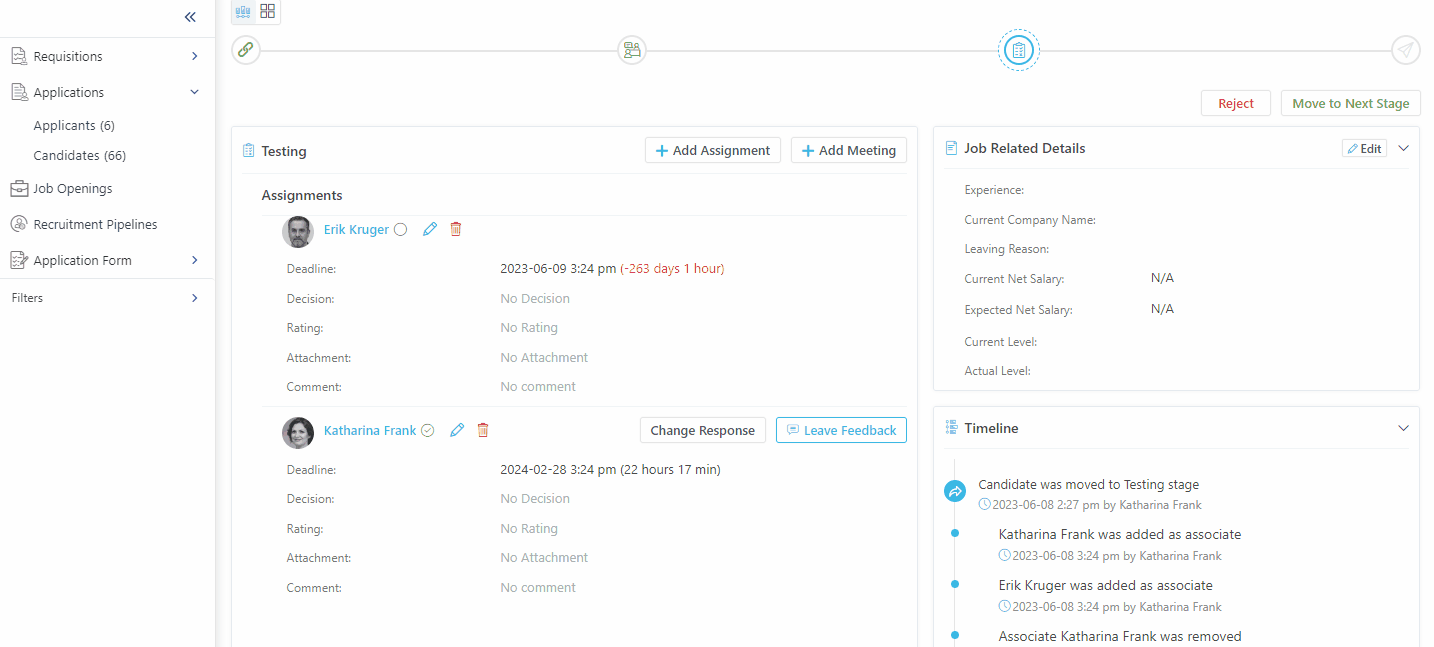
Near each person who has been assigned an assessment to complete you will see the following icons:
- A small circle indicating whether the person completed the assessment
- An edit icon allowing to make changes (change the due date of the assessment)
- Delete icon, to remove the assessment and even the evaluation left
Once you are ready to move forward you can either click the Reject button or continue the recruitment by again clicking the Move to Next Stage button.
Scheduling Meetings
Depending on which stage the candidate is, you'll be able to schedule a meeting with the candidate and associate. To do that perform the following steps:
- Click + Add Meeting button
- In the pop-up window for the meeting invitation you will see and fill in the following fields (just make sure you click More Options button near To field to have more options):
- From: the field will be inactive as it already indicates the sender's name and email address
- To: the field will show the name and email addresses of the candidate and associate(s)
- Event date and time
- Email Subject
- Location: you can enter the location manually
- In case the integration is enabled you will be able to choose the available meeting rooms
- Candidate Email Text: you can choose not to send an email to the candidate
- Attachments: you are free to browse and upload any attachments from your device
- Email Template: you can select the email template that was created beforehand in the Settings → Customizations section
- Signature: you can select a specific signature specifically for this email in case it is created in advance
- Finally, the email content: you can either write it manually or if the template is used just add any adjustments using the tools of editor
- Once everything is ready, simply click the Send button
After the invitation is sent you are always able to edit the date and time of the event. The only thing you need to remember is that you cannot change the date and time of an event which due date has passed.
To modify the event, please perform these steps:
- Expand the Actions menu near the meeting name
- Click Edit button
- Select those Associate that should participate/or receive updated event info
- Check the box to send the updated information to the Candidate as well
- Modify the event date and time
- Finally, expand the drop-down Send Updates To and select who you wish to receive the updated email: Candidate and/or Associate
Once the invitation is sent the meeting status will change to Upcoming. Here's what you can do next:
- Edit: Modify the meeting details if needed
- Get Responses: Track who has accepted or declined the invite
- See Details: Review the complete meeting information
- Cancel Meeting: If necessary, you can still cancel the meeting
Important: The ability to send messages to candidates depends on whether you're assigned as their recruiter. If you are, you can access the Send Message feature in two ways:
- From the Candidate's Stage: Locate the candidate's current stage within the recruitment process. You'll find the Send Message option within that stage
- From the Candidate Profile: Go to the candidate's profile page and navigate to the Messages tab.
- Sent via Integration is ON: You can send messages through
your connected email service. - Sent via Integration is OFF: You can't send messages through integration at this time. This could be due to the integration being disabled for your organization or you not being logged in with the correct email. Please check with your administrator or login with the appropriate email address.
Click here to learn more about connecting raiseR with third-party email services
Steps to Send a Message:
- Sent via Integration: Enable the switcher to indicate the message will be sent through your organization's integrated email service.
- From: This field displays the sender name and email address associated with the integrated email service.
- To: The field displays the recipient's (candidate) name and email address of your message
- CC: Include additional email recipients who should receive a copy of the message
- BCC: Similar to CC, include email addresses of people who will receive the message without being shown to other recipients
- Type the valid email address of the external recipient in the CC or BCC field, Add External Email will appear below the field, click it to confirm adding the external email address
- Scheduled: When activated, allows you to schedule the message to be sent at a specific date and time
- Attachments: Attach relevant files to your message
- Email Template: Choose a pre-defined email template for standardized messaging
- Signature: Your organization's email signature might be automatically added to the message
- select a specific signature from a dropdown menu
- Subject: Craft a concise title summarizing the message content
- Message: Compose the main text content of your message
- HTML Editor: Use formatting tools to polish the message body for improved readability
- Generate AI Button: Use the button to generate content suggestions within the message body
Additional Fields (Available with Integration OFF):
- Sender Name: This field allows you to manually specify the name that will appear as the sender of the message
- Sender Email: This field allows you to manually specify the email address that will be used to send the message
- By default, it will be sent from [email protected] if no email address is entered
- Cancel Button: Discard any changes made to the message and close the window
- Save as Draft Button: Save the message for future editing and sending
- Send Button: Send the message to the intended recipient
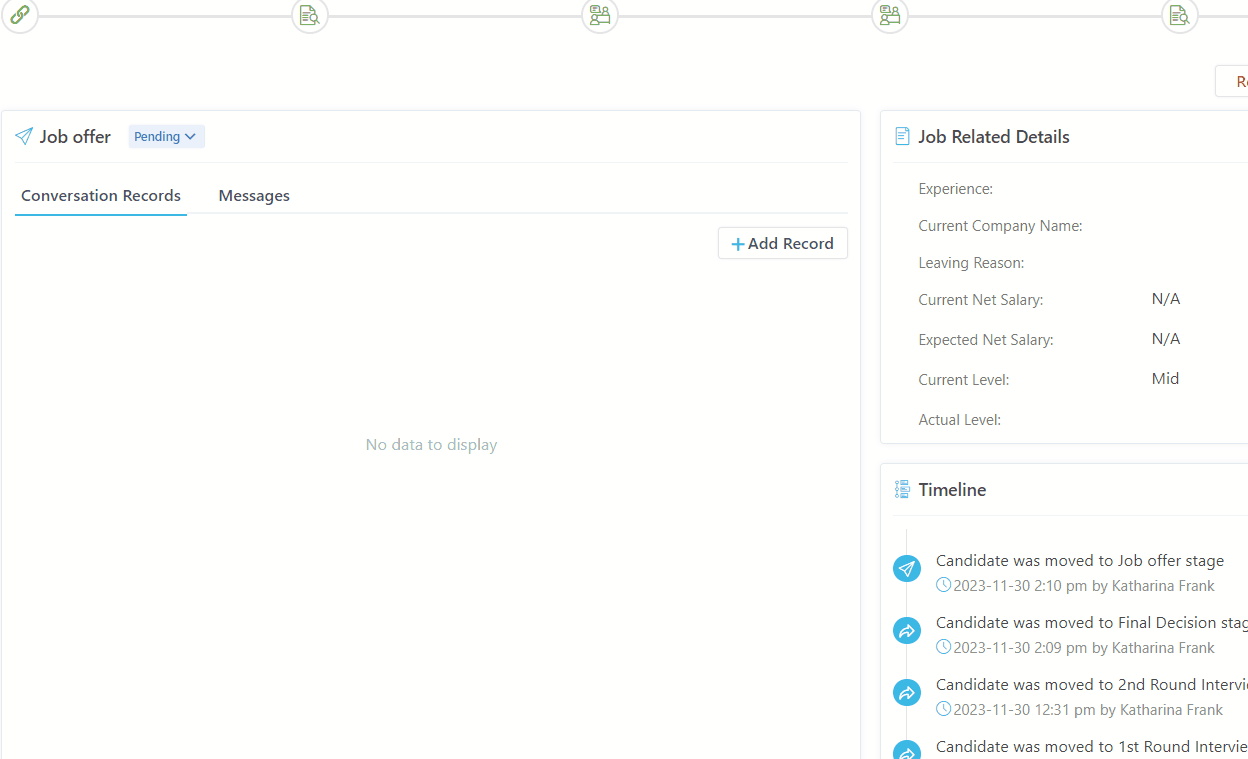
Finally, when you reach the Job Offer stage you are able to:
- Select the status of the Job Offer stage
- Pending
- Approved
- Rejected
- Log the conversation with the candidate by clicking the + Add Record button
- Send Email within the Job Offer stage
Finally, once all the records are gathered, and emails are sent, you are very close to completing the hiring process. You will need to
- Just one more time click the Move to Next Stage button
- Click the arrow next to the button to reveal a dropdown menu. This menu allows you to move candidates to any custom stage from the current flow or move directly to the Job Offer stage
- Click the Reject or Hire button
- Reject: specify the rejection reason which needs to be created in advance from Settings → Customizations → Key Properties section
- Hire: you can make an employee profile from the candidate's profile by enabling the radio button. Also, do not forget to specify the Hire Date
- Once you click Save you will be navigated to a new page where you will need to enter the Employee information