Creating a Requisition
Requisitions are considered as an essential part and even the very beginning of the entire recruitment process for every organization. By creating a Requisition you or the Hiring manager will let the executive team know about a need of a new talent.
The Requisition section consists of 3 main sub-sections:
- Requisitions to Approve: here you will find all those requisitions that are awaiting for approval and of course, you should be involved in them to work with them;
- My Requisitions: here are located only those requisitions that are created by you;
- All Requisitions: here you will find the full list of requisitions that are created in your company.
Note: To have access to the Requisitions section and also make changes here you should have the respective permissions assigned to you from Company Settings → Roles and Permissions → User Management or User Roles.
To create a new Requisition, perform these quick steps:
- Make sure you are logged in to your raiseR account;
- Navigate to the Hire module and click + Add Requisition button;
- You will be taken to a new page where you will need to enter the Position and Requisition Details.
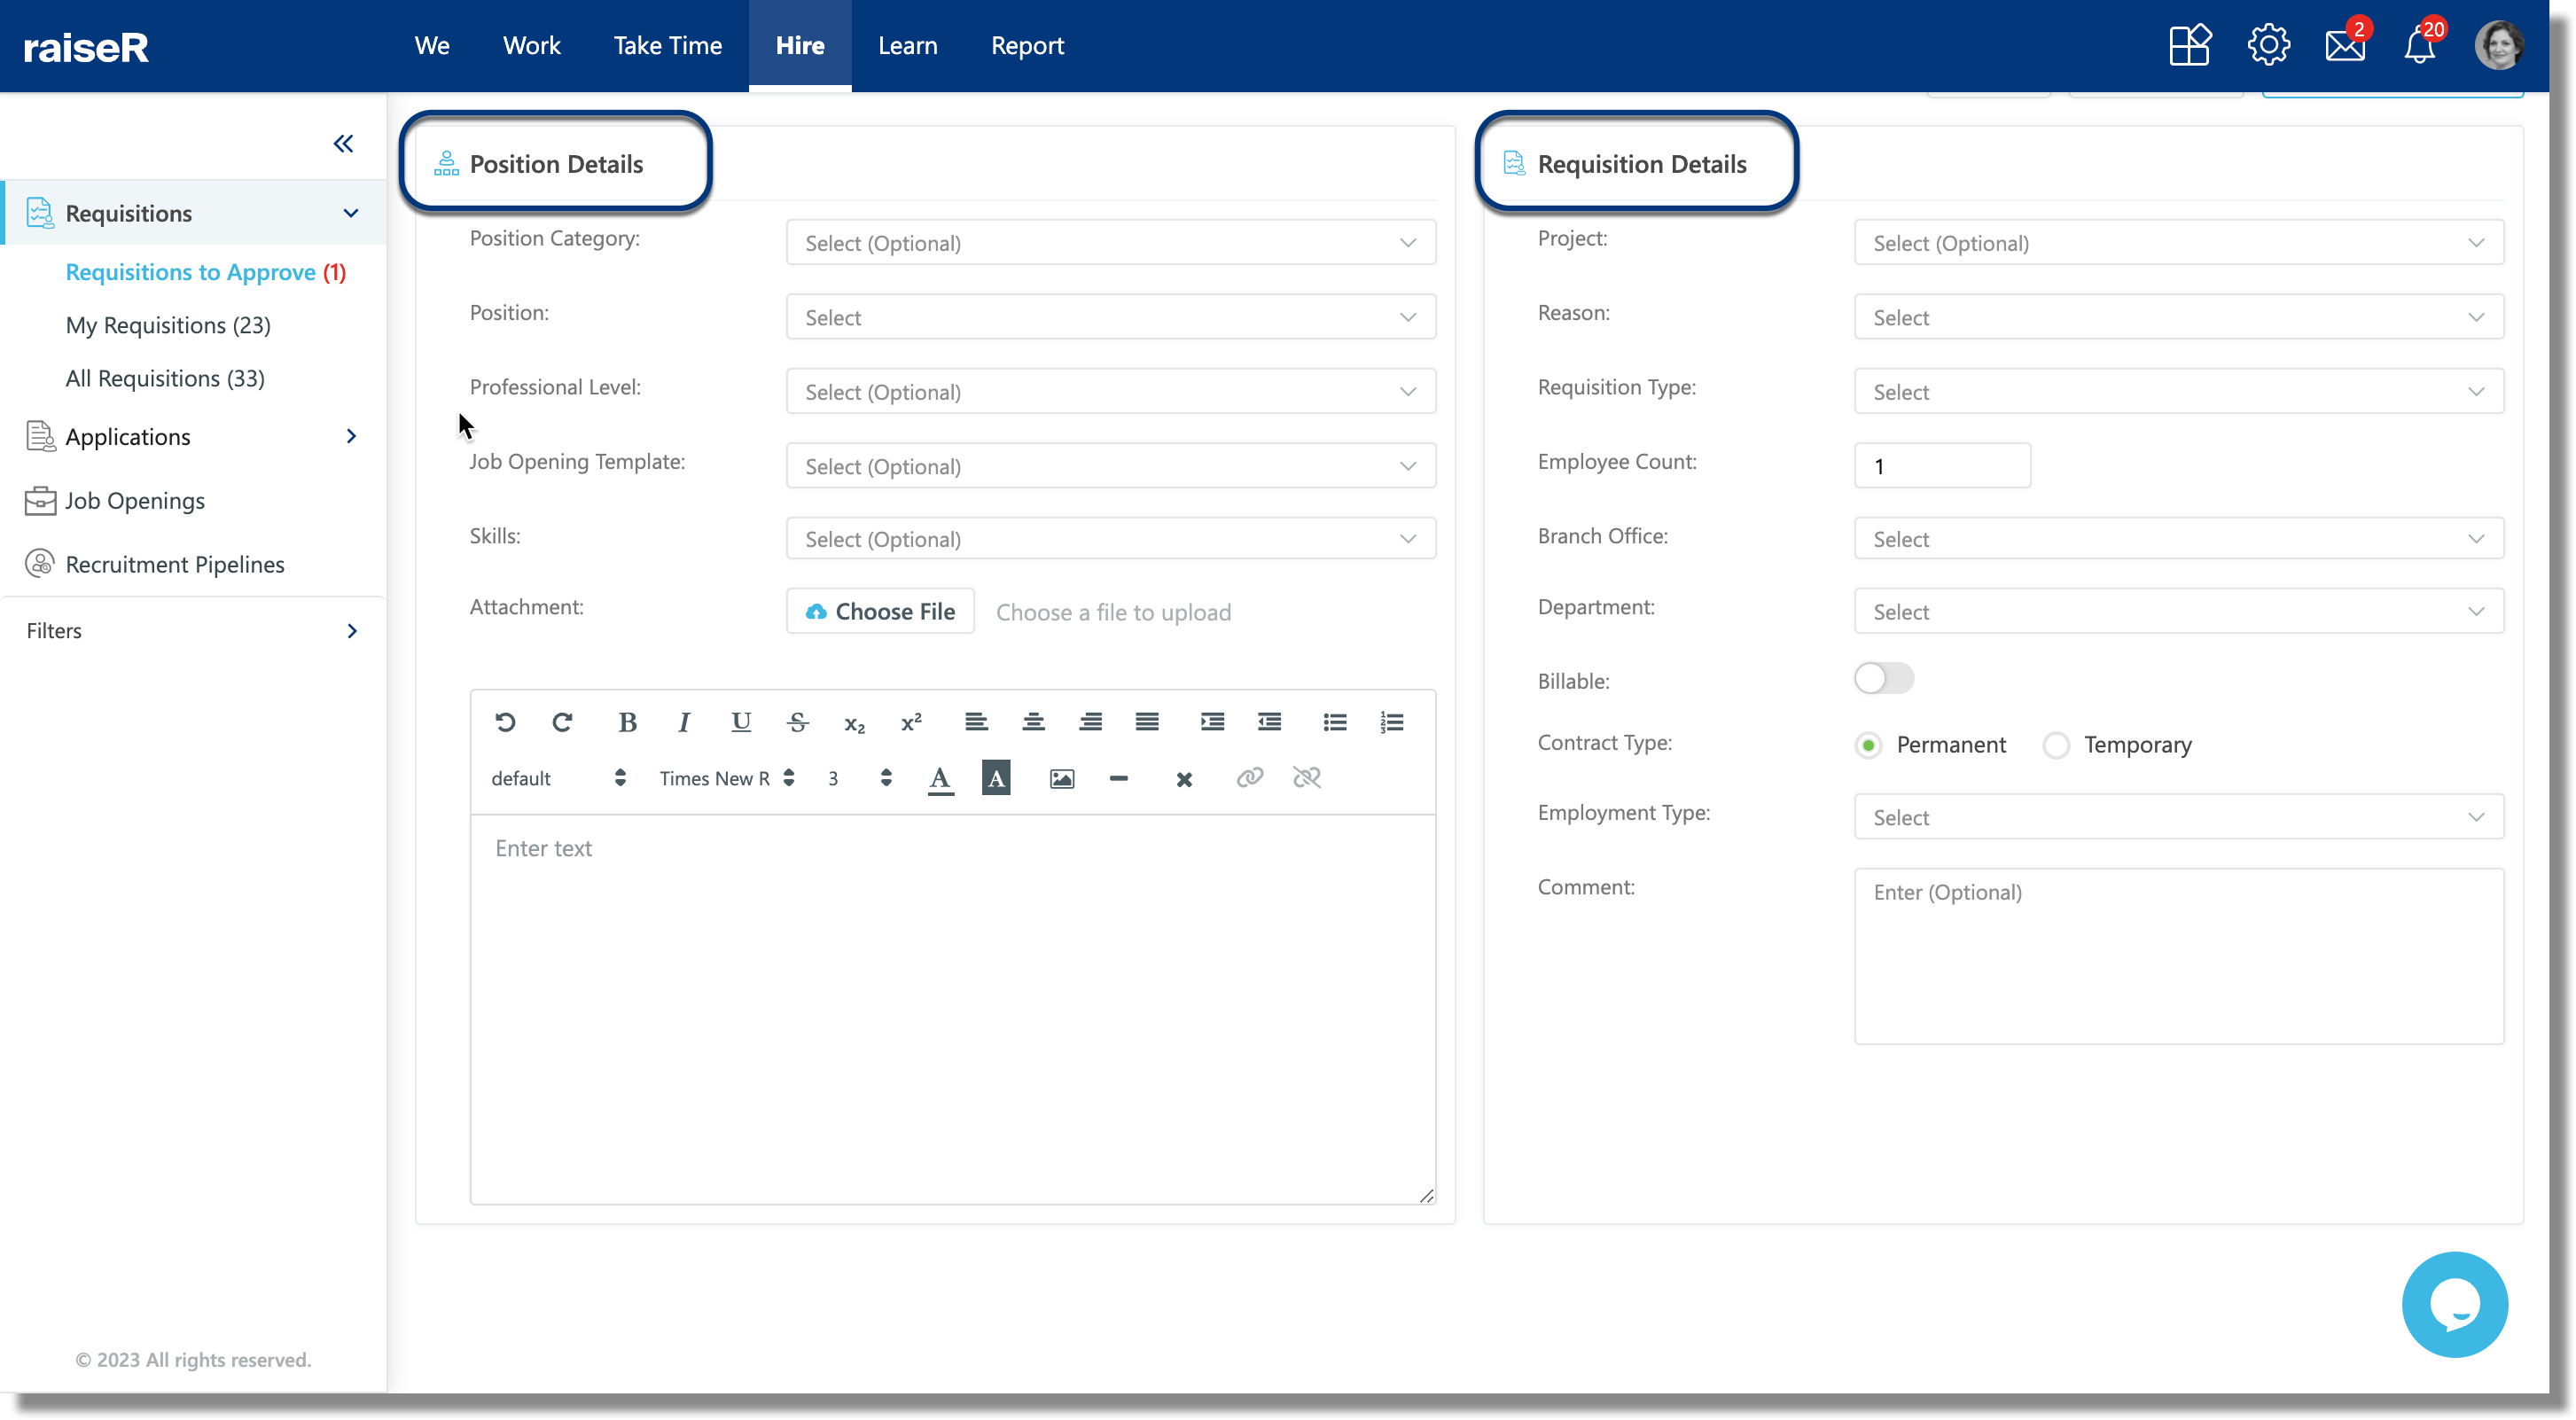
- Select the Position Category (optional field): choose the position category you have already created when configuring the Settings;
- Select the Position;
- Professional level (optional field): select the level for the position you are seeking to hire (junior, mid or senior);
- Job Opening Template (optional field): from the dropdown menu, select the template for Job Opening you have created when configuring the Settings;
- Skills (optional field): select the skills that the applicants should have to match this position;
- Attachments (optional field): in case you would like to have any files attached to the requisition you can browse them from your device;
- Finally, enter the text for the Job Opening Requisition which is going to be visible to the Approvers.
Requisition Details
- Project (optional field): select a project that this position should be applied to;
- Reason (required field): indicate a reason why the requisition and job opening is needed;
- Requisition Type (required field): select the type of requisitions (planned, unplanned, unplanned urgent);
- Employee Count (optional field): specify the number of people needed for the position;
- Branch Office (required field): select the Branch Office the position/new employee is needed for;
- Department (required field): select the Department the position/new employee is needed for;
- Billable (optional field): enable to toggle to let the approvers know if the position is billable or not based on the Project field;
- Contract Type - indicate whether the contract is permanent or temporary;
- Employment Type (required field): indicate the type of employment (full time/part time);
- Comment (optional field): add any comment visible to the approvers only.
Once you have finished creating the requisition either click Save as Draft to be able to edit the requisition anytime you want or click Send For Approval so that the approvers receive notification about new pending requisition.
