Creating and Working with Job Openings
Job Opening Section Overview
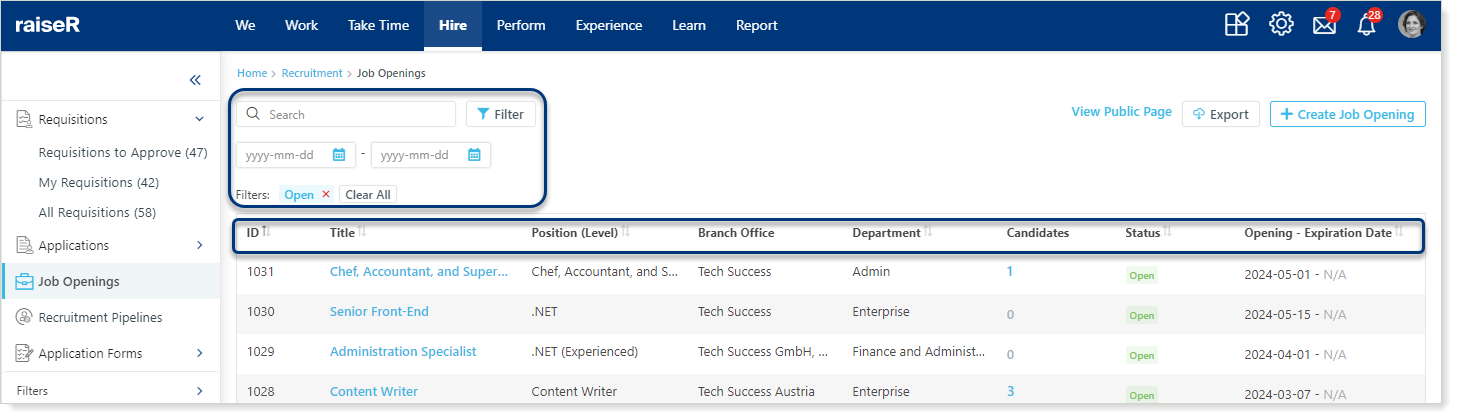
Another section in the Hire module that plays essential role in the entire Talent Acquisition process is raiseR's Job Openings. To access this page you will need to navigate to the Hire module → Job Openings where you will have the following view:
- A Search field to find specific Job Opening by typing its name
- Filter button
- Date range fields to select and apply date to see all Job Openings that have been posted and closed during that period of time
- The list of all Job Openings that you have (Open/closed)
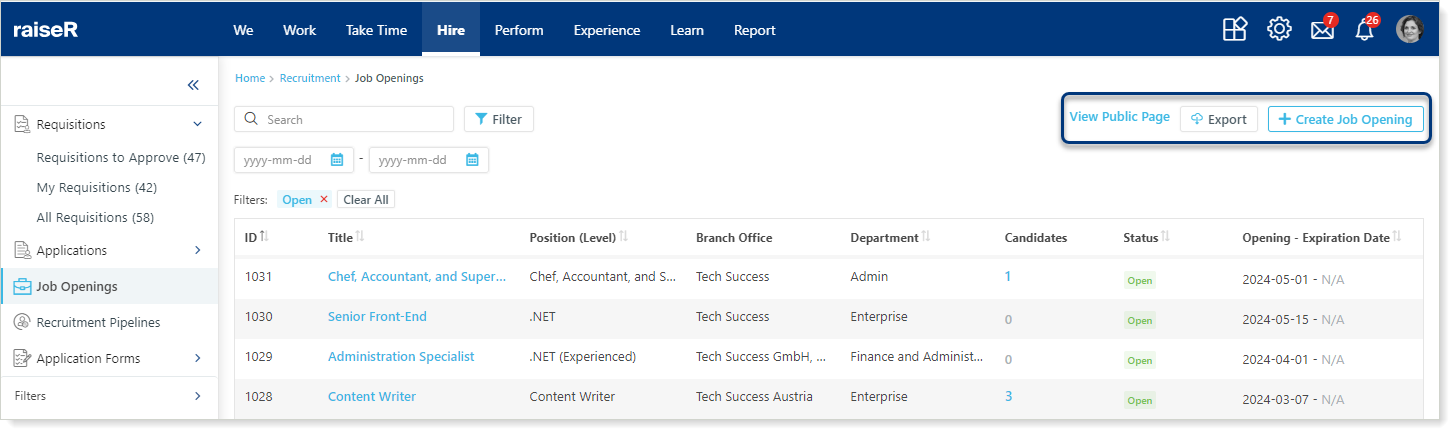
Besides the above-listed options you can:
- Navigate to your open vacancies page by clicking View Public Page hyperlink
- Export all of your Job Openings, even those ones that you have found using filtration options
- And finally, you can create a new Job Opening by clicking + Create Job Opening button
Creating a Job Opening
Note: Before digging deep into the creation process let's keep in mind that any requisition which was created and approved can also become a Job Opening.
To create a Job Opening follow these quick steps:
- Make sure you're in the Job Opening section of the Hire module
- Click + Create Job Opening button
- Fill in the mandatory fields, which are:
- Job Opening title (publicly visible)
- Opening date
- Recruitment Pipeline: you will need to pick a pipeline that has been created in advance
- Auto-linking of Applicants: Turn on the switcher to automatically link applicants to the relevant job opening they applied for
- If an applicant's email address matches an existing candidate in the system, and that candidate is already assigned to the same active job opening, the applicant will not be automatically linked
- Position: select the position the hiring process should start from. Make sure the Position is created in advance in the Settings → Company Structure → Positions
- Branch Office: select branch office(s) the position is required for
- Department
- Contract Type: Permanent or Temporary
- Employment Type: full or part-time
- Select the Recruiter(s) for this specific Job Opening
- Specify the Hiring manager
- Reason: select the reason for starting the recruitment
- Request type: specify whether the request for the position is Planned; Unplanned or Unplanned Urgent
- And finally, Employee Count: Specify how many specialists you will need to hire for this position
- Once all the needed fields are filled in click the Save button
Tip: You might want to add a Job Description and Skills which will allow your applicants to find out more details and specifics about the position they are applying for. Here you can select a Job Opening template which needs to be created beforehand.
Important:
- If you wish to make the newly created Job Opening accessible from your company's Public page then hurry up to activate the Post in Public Page switcher in the Public Settings section.
- Enable the Send Notification switcher to send push notifications to your current employees who have the Raiser app installed on their devices to notify them about new vacancies for a potential referral.
- Enable Notify Applicant(s) to send an email notification directly to any external applicants who have already applied for the job opening.
- Choose the specific information you want to display on the public job opening page from the Public JO Fields dropdown list. This can include details like opening date, closing date, and position title.
Contract type, Employment type, and Location are already included by default and the Job Opening Description, Opening Date and Closing Date options are pre-selected.
- Link a specific application form to this job opening. When applicants view the job description, they will see the linked form and be able to apply directly. Choose the form from the Linked Application Form dropdown list.
Working with Job Openings
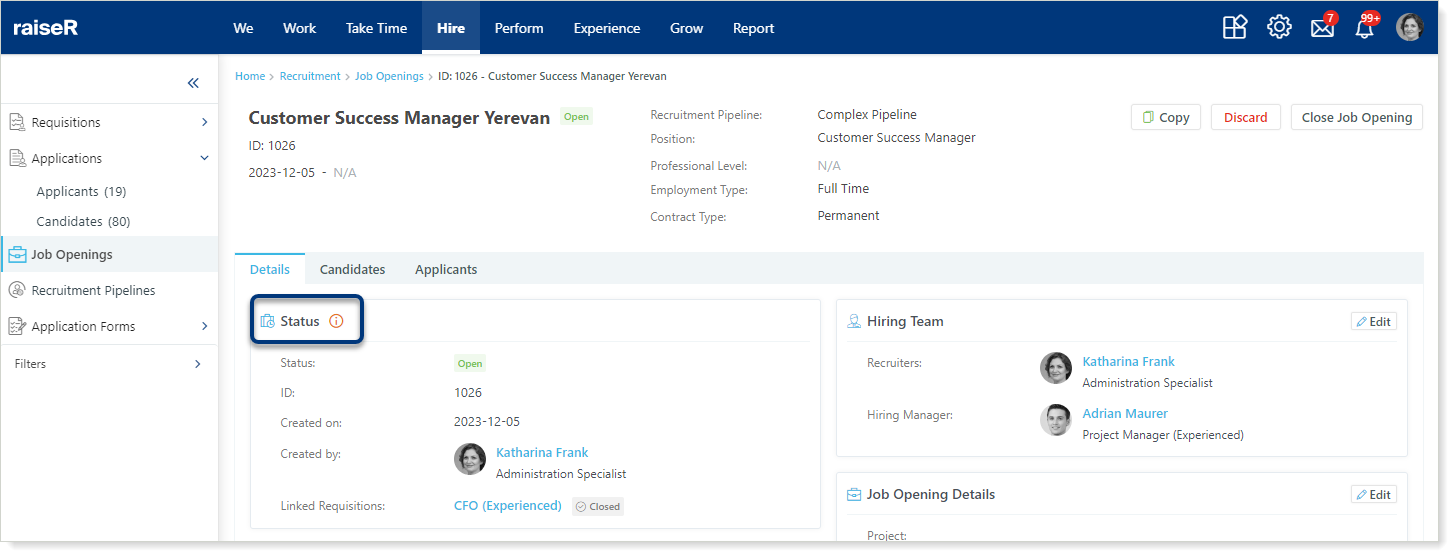
You can view any Job Opening and even see all the candidates and applicants list who applied for it and much more. To do that, click on the job opening and you'll be navigated to its page where the data is divided into the following tabs: Details; Candidates; Applicants.
- Status: this field shows whether the Opening is open or closed; its ID, creation date and the creator.
Tip: Sometimes you may notice a little info icon ⓘ near the Status field. This means that your Job Opening can be closed since you have hired the required number of specialists and there is no need to keep it open.
- Position details which were entering when creating the Job Opening. You can edit those details anytime by clicking Edit ✎ button
- Job Description field: again displays the details that were entered when creating the Job Opening
- Hiring Team field: shows the Recruiters and Hiring managers selected during the Job Opening creation process
- Job Opening Details: shows already specified information.
- And Finally, the Public Settings: and again this field shows the configurations there were applied when creating Job Opening
Any field can be always modified. Simply click Edit ✎ button to make adjustments.
You can always Discard, Close the Job Opening and even Copy depending on actions permission levels that you as the account user have.
Note: When performing any of the above-mentioned actions (Close or Discard) you will need to specify the reason behind that action. The reason should be created in advance from the Settings → Customizations → Key Properties.
Candidates
This tab contains the names and profiles of all candidates that are linked to this Job Opening.
You can also use the Quick Filters to see the names of only those candidates in whose recruitment process you are involved in the Hiring Team
Important! Candidates automatically linked to a specific job opening who haven't been reviewed yet will appear with a red dot. Use the Application Status filter to focus on candidates with Opened or New statuses.
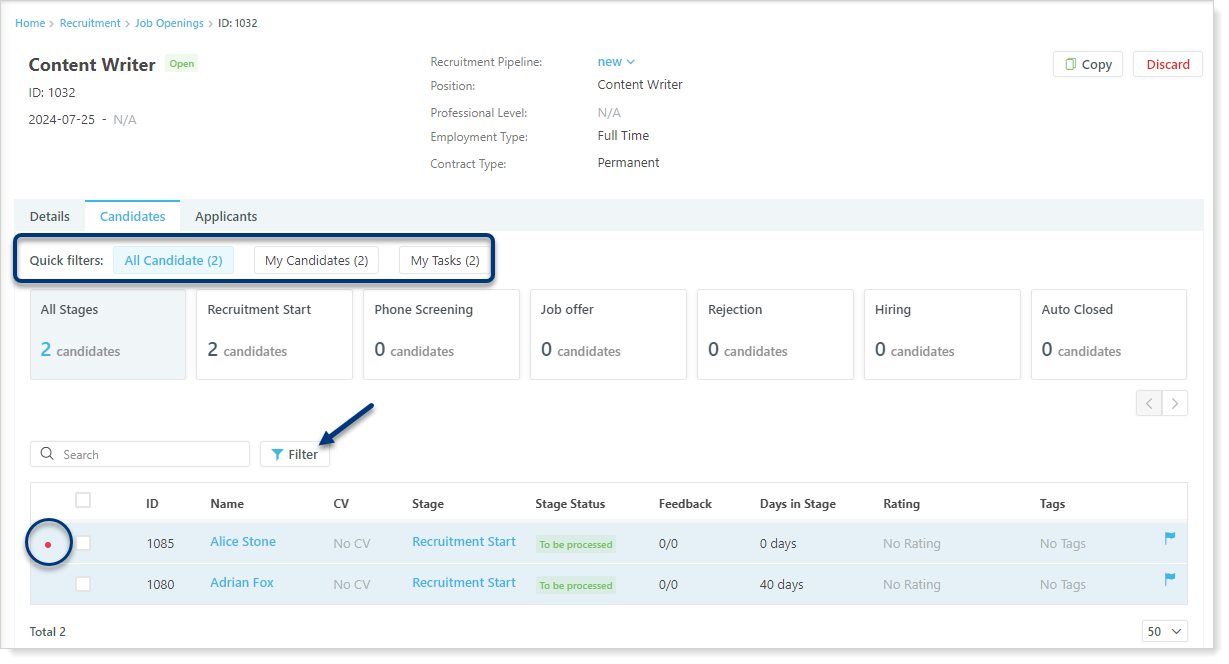
Right below the Quick Filters you will see the Stages of the pipeline which were linked to this Job Opening. Each stage will display the names of corresponding candidates that are currently there.
You can select one stage at a time or select them all. As a result, the system will show the candidates with all the relevant information: ID; Full Name; CV which you can download; Stage; Status; Feedback; Rating and Tags. You can read more about Candidates by clicking this link.
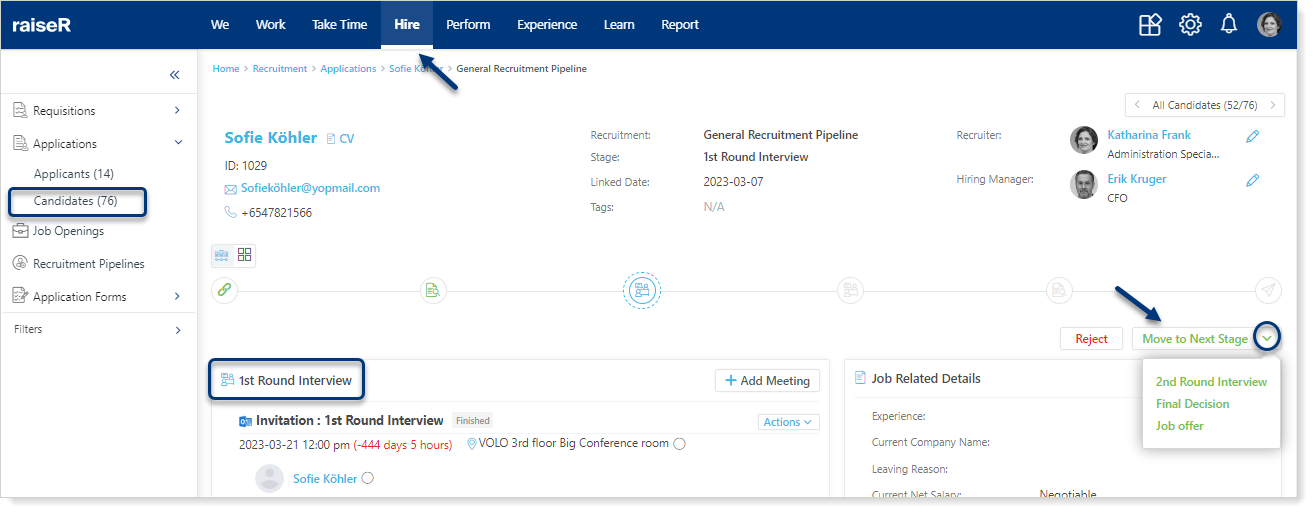
The Move to Next Stage button offers two ways to progress candidates through your hiring pipeline:
- Standard Move: Click the button to move the candidate to the next stage in the flow.
- Advanced Move: Click the arrow next to the button to reveal a dropdown menu. This menu allows you to:
- Move Candidates to any custom stage from the current flow
- Move directly to the Job Offer stage
Note:
- The Move to Next Stage button only appears when you're viewing candidates in a specific stage (not All Stages).
- The arrow won't be visible if the candidate is already in a stage within the flow.
Tip: Access Move to Next Stage within the relevant stage on the Hire → Applications → Candidates page.
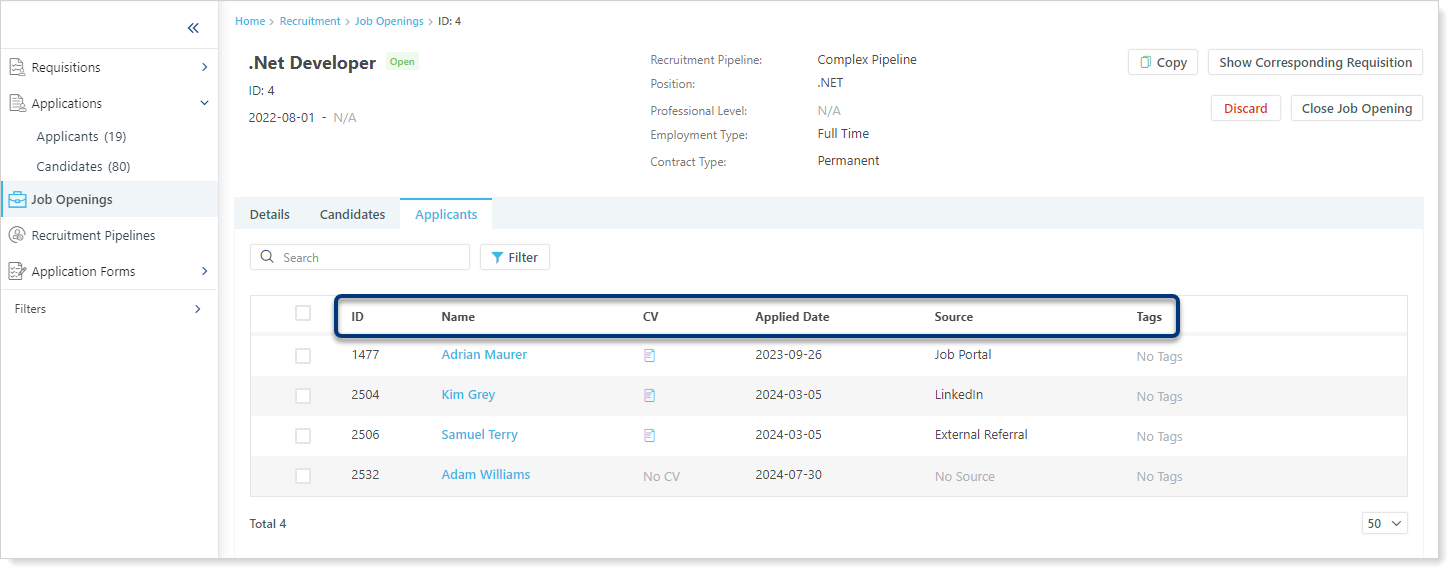
Applicants
This tab contains the names and profiles of all applicants who have applied for this Job Opening through the public page or you have added them manually. As you can notice the view of Applicant information is completely different here. You can only see the ID; Full Name; CV; Application Date; Source and Tags here. By clicking the Applicant's name you are being navigated to their page. To learn more about Applicants feel free to check out this article.