Working with My Messages
The correspondence will be organized and handled through the following subsections:
- Inbox: This section is your central hub for managing incoming emails and email threads. It's where you'll find messages that have been received from external sources or within the raiseR system.
- Sent: In the Sent section, you can keep track of all the emails that have been sent from raiseR. This includes emails sent by you as well as those sent by your colleagues using the raiseR platform.
- Scheduled: Emails that are scheduled to be sent at specific dates and times are housed in the Scheduled section. This feature allows you to plan and automate your email communications.
- Drafts: The Drafts section is where you can store emails that you've created but haven't sent yet. It's a convenient place to work on and refine your messages before they are dispatched.
Important: Only those users who own an Administrator role within the raiseR account will have access to My Messages section.
To appear in the My Messages section:
- Click on your profile avatar.
- Choose the My Settings section.
- Select My Messages.
- OR: Click the My Messages icon on the main menu bar.
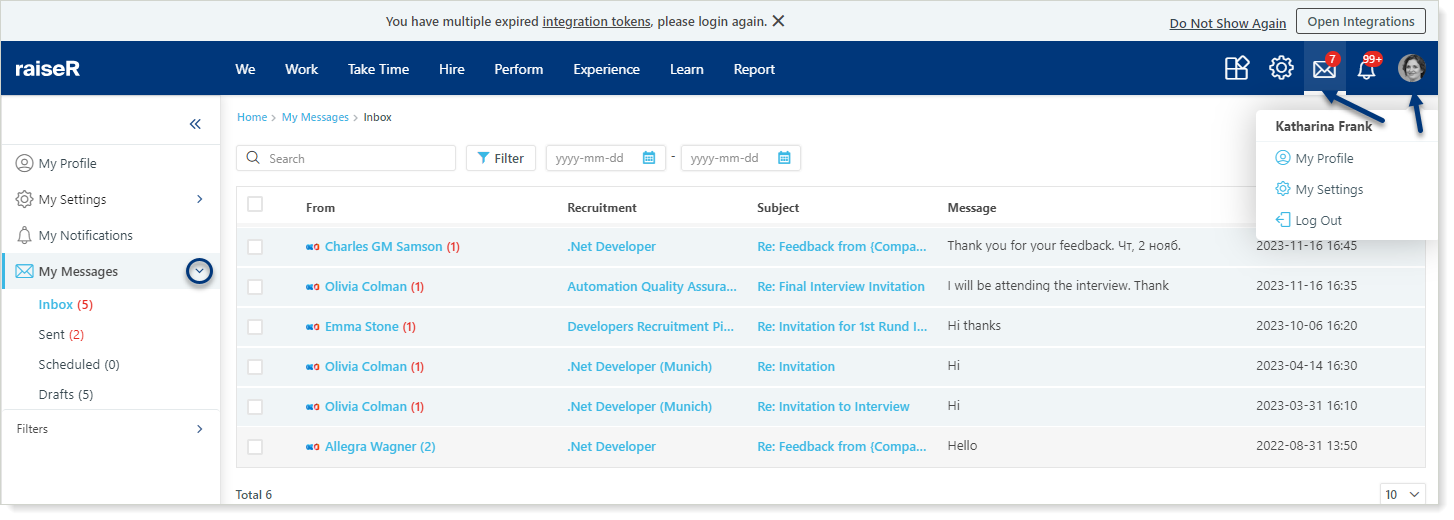
Tip: The number(s) in red brackets next to the Inbox and Sent messages indicate the count of threads containing unread messages, while the number(s) displayed in the list next to the candidate's name shows the count of unread messages within that specific thread.
Sending an Email from raiseR
Tip: Before sending an email, verify that the corresponding Integration Service is connected and has a valid expiration date. (Click here for instructions).
- Make sure you are in any of the following My Messages sections: Inbox, Sent, Scheduled, Drafts.
- Click the Send Email button.
- Now let's understand what each field means:
- From: Shows whose inbox the email will be sent from.
- To: Select the recipient among your candidates the email should be delivered to. By clicking more options you can select if you need to choose the recipients based on the Job opening or Recruitment Pipeline they are linked to.
- Job Opening Name: From the drop-down menu select the job opening title.
- CC and BCC: Copy anyone on your team into the email. Just make sure they have the user role required for this correspondence.
- Schedule: Enable the toggle to schedule the email to be sent on the desired date and time.
- Attachments: Include any attachments from your device that you would like to add to the email.
- Email Template: If you have created an integration email template, then now it is time to use it.
- Signature: Select the signature that you created in your account settings in advance.
- Subject: Specify the subject of your email.
- You are free to modify the text or add any new content to the email body using the tools of HTML editor.
Managing Your Emails
You can see all Email correspondence, grouped per email threads and displayed in a table.
The table showcases recipient names, recruitment or job opening titles, email subjects, brief message excerpts, and email creation dates, each neatly organized under their respective columns.
- By clicking on the Candidate's name, the system will redirect you to the candidate's profile.
- When you click on Recruitment, you'll be directed to the corresponding recruitment pipeline or Job Opening page.
- Clicking on the Subject will open a page where email messages are grouped together in a single conversation.
Marking Emails as Read or Unread
To change the status of an email thread:
- Select the folder that contains the email thread you want to change the status.
- Select the checkbox that is to its left. If you want to select all email threads in the folder, select the checkbox on the table header. Upon selection, a new Actions button appears next to the Send Email button.
- Click Actions and select Mark as Unread.
As you mark an email thread as Unread, you will notice the index showing the number of unread emails gets updated.
To change the status of an email to unread:
- Select the folder that contains the email you want to change the status.
- Click the email subject to open the email thread.
- Click a round button on the right side of each email to change its status.
Congratulations! You've now acquired the skills to send emails from raiseR and effectively handle all correspondence within their respective groups. You can seamlessly transition to the next step, which involves managing filters to view emails based on your specified criteria.