Working with Time Offs Feature
In this article, you'll discover the key features of raiseR Time Off Management system. It makes requesting leave easier for both employees and managers.
Its key benefits are:
- Effortless Tracking: Easily record, manage, and keep track of employee leave details;
- Automatic Balances: Eliminate manual calculations. raiseR accurately tracks vacation balances, displaying the remaining days for each employee;
- Self-Service Scheduling: Empower both employees and managers to plan absences with just a few clicks;
- Enhanced Admin Controls: System administrators can create reports, request leave on behalf of employees, approve or cancel requests, and manage individual holiday policies.
Viewing Time Off Requests
It is possible to view the leave/time off requests using the List and Calendar view options. .
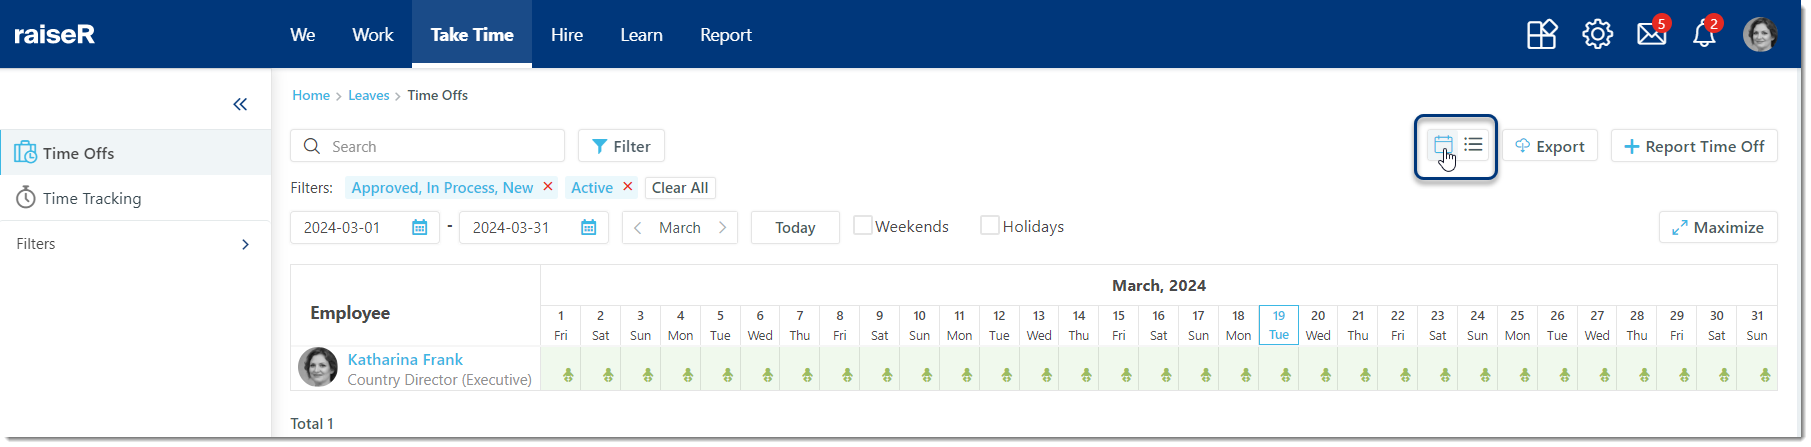
Calendar View
The system opens in Calendar view by default, displaying employees with scheduled time off for the current month.
You can view the information using the:
- Filters to refine the calendar view:
- Date Pickers: Change the date range using the date pickers located above the calendar;
- Month: Use the arrows to navigate to the previous or next month;
- Today: View time offs for the current date within the chosen date range;
- Weekends: Show weekends highlighted with a red line at the bottom of the cell.
2. Time Off Display where cells filled with color represent employee time off.
The color corresponds to the time off type, and a tooltip appears on hover, displaying:
- Time off name;
- Time period;
- Approval status (number of approvers who approved/haven't approved).
3. Zoom Functionality which allows you to maximize/minimize the calendar view.
Note: When selecting a Start Date in the date pickers, the system automatically populates the End Date based on a 12-month difference.
Example:
Today's date: 1/04/2024
You select a Start Date: 01/05/2024 (12 months from today)
The system automatically fills the End Date: 01/05/2025 (12 months after the Start Date)
All dates after the automatically populated End Date will be disabled and unavailable for selection.
List View
The Time Off Requests list includes the following fields: Time Off Type, Employee, Period, Request Date, and Status.
The following statuses are available for Time Off Request:
- Approved: Assigned when all designated approvers have approved the time off request;
- Discarded: Applied to requests that were reported in error or when the employee no longer needs the time off;
- In Process: Assigned when there are still pending approvals from one or more approvers;
- New: Assigned to new requests that require review and response from approvers;
- Rejected: Applied to requests that have been denied by an approver:
- If there are additional approvers, they won't receive the request for further review.
For a more targeted view, use filters and date pickers similar to those available in the Calendar view (excluding Weekends, Holidays, and Zoom options). Refer to the instructions below for more details:
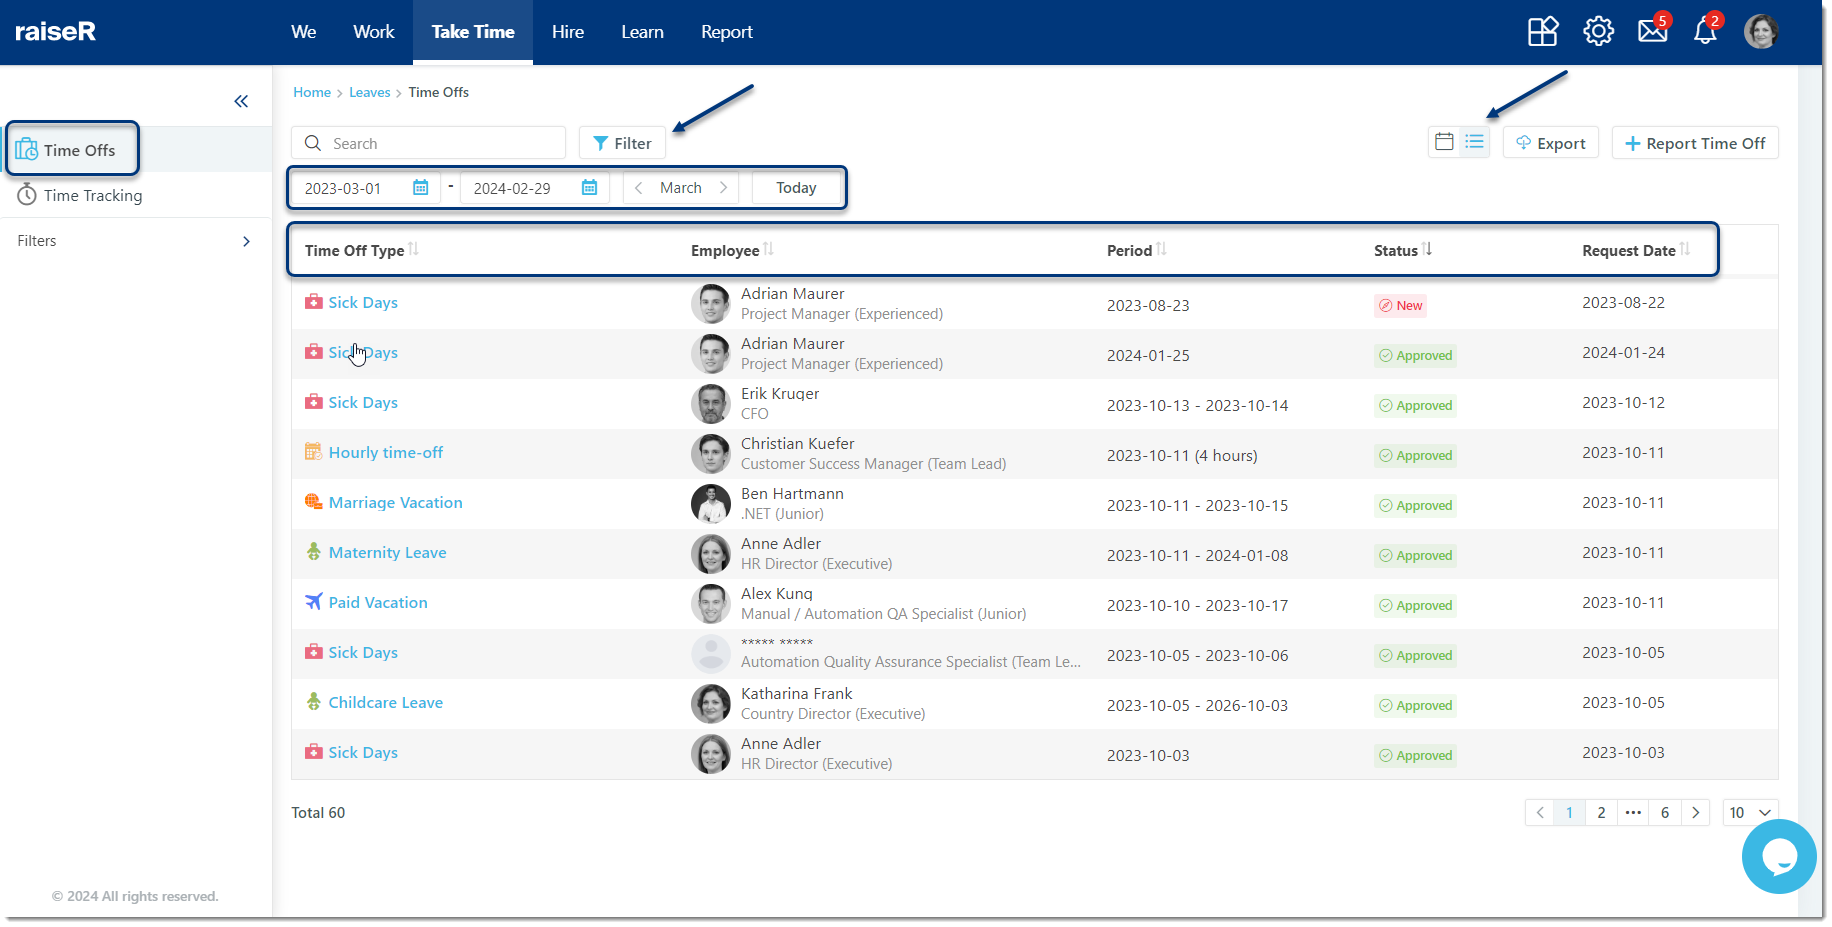
Use the Export button to download a list of all time off requests.
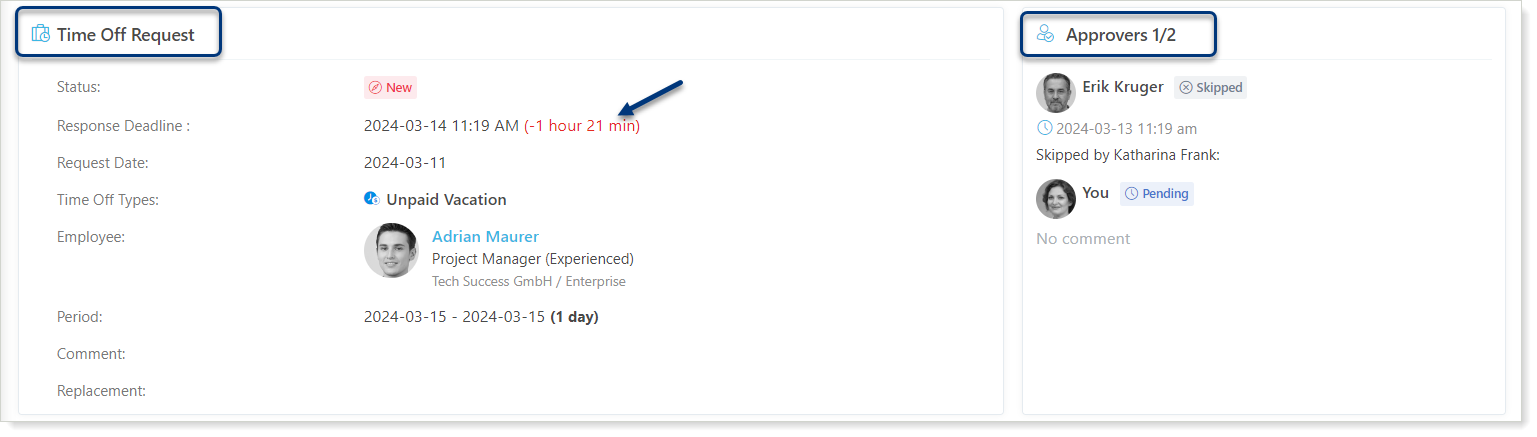
Viewing Time Off Request Details
To see more details about the requested time off simply click on it. You'll be taken to a new page with the following fields:
- Time Off Request: This section provides key information about the request, including:
- Request Date
- Deadline
- Employee Name (who applied)
- Time Off Type
- Request status
- Other relevant details (depending on the system configuration)
- Response Deadline shows the due date for the response. If overdue, the elapsed time appears in red (negative number).
2. Approvers: This section lists the designated approvers for the request, displaying:
- Number of approvers who approved/haven't approved
- Names
- Current approval status (e.g., Approved, Pending, Skipped)
- Actions taken (e.g., Approved, Reported Time Off, Skipped Other Approvers)
- Approval Date and Time: The date and time when the corresponding action was taken by each approver.
Tip: Deadlines for responses are pre-defined within the Approval Flow settings.
Reporting Time Offs
Only authorized users with appropriate permissions can report time off on behalf of employees. These are typically direct managers or those designated with such access.
To report a time off, perform these steps:
- Navigate to Take Time → Time Offs;
- Click the + Report Time Off button;
- Fill in the following mandatory fields:
- Employee: Select the employee for whom you're reporting the time off;
- Time Off Type: Choose the appropriate leave type from the available options (e.g., paid vacation, sick day):
- Click the Policy Details link below to see a description of this time off type and any attached file (see in the opened tooltip).
- Start Date: Enter the first day of the requested leave period;
- End Date: Enter the last day of the requested leave period.
- Comment (Optional): Provide any additional details regarding the time off request;
- Replacement (Optional): Designate a replacement employee who will cover the requesting employee's duties during their absence;
- Click Report to submit the time off request or Cancel to discard.
Working with the Requested Time Offs
Once time off requests are submitted, designated approvers with the appropriate user role will receive them for review.
Tip: Ensure you have set approval flows in Settings → Approval Flows → Time Off beforehand. This involves defining the approval flow, assigning approvers, and associating relevant branches with the template. For more information, refer to the relevant article.
Only requests with a New status are available for approval. Each approver will only see requests that are currently awaiting their response.
Approving or Rejecting Time Off Requests
To approve or reject time off request:
- Go to Take Time → Time Offs;
- Choose a request with the New status (these are pending your approval):
- Click on the selected request to open it.
- Click the Respond button;
- You can optionally add a comment to explain your decision and suggest a replacement employee in the designated fields;
- Click Approve to grant the request or Reject to decline it.
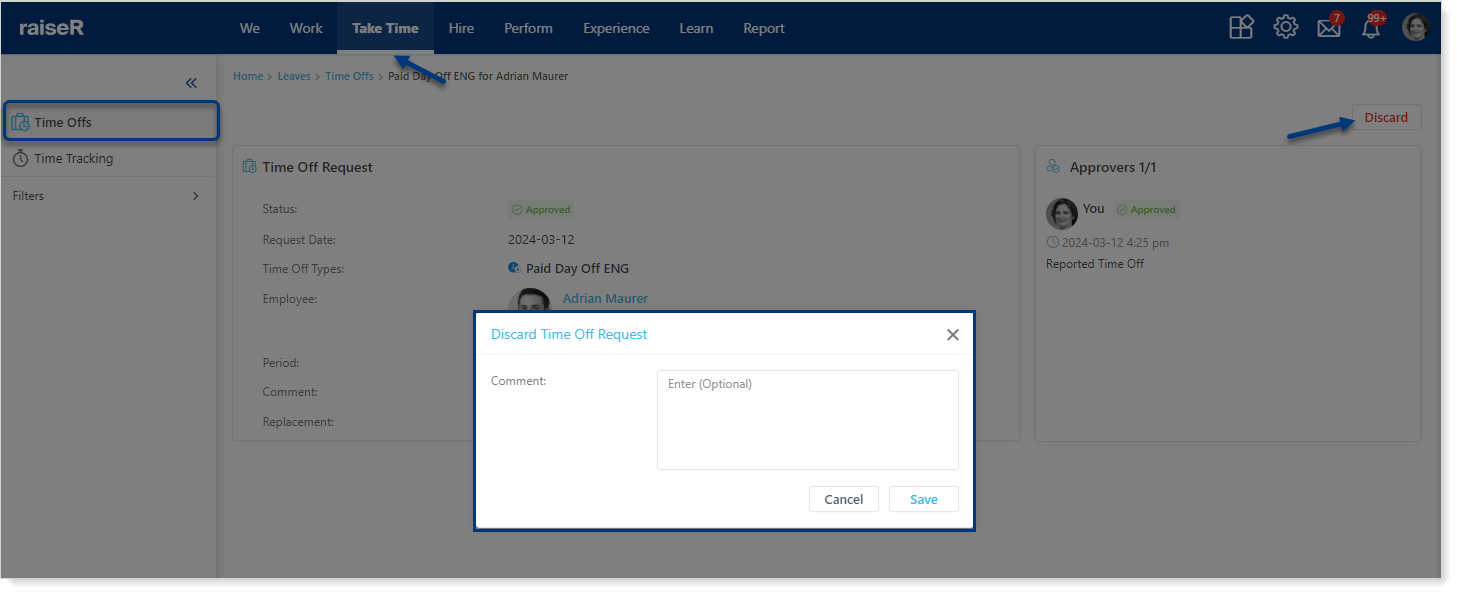
Discarding Time Off Requests
As an administrator or approver, you might need to discard a time off request in certain situations. Here's the process:
- Go to Take Time → Time Offs;
- Choose a request;
- Click the Discard button;
- You can optionally add a comment to explain your decision;
- Click Save to confirm discarding the request. Click Cancel to keep the request unchanged.
Skipping Time Off Requests
As a designated approver with the appropriate permissions you can skip other approvers in a time off request workflow. Steps to Skip Approvers are:
Go to Take Time > Time Offs;
- Choose a request with the In Process status (meaning other approvers haven't responded yet);
- Click the Skip button:
- A pop-up window will appear, seeking confirmation.
- Click Confirm to approve the time off request and bypass any remaining approvers in the workflow or click Cancel to return to the request details page.
Recalling Non-Accruable Time Off Requests
The Recall functionality allows you to modify an already approved time off request.
Important: The Recall icon will only be visible for requests that meet all these conditions:
- Non-Accruable Time Off Type
- Approved Status
- Date Range (the start date must be today or in the past, and the end date must be a future date).
Steps to Recall a Time Off Request:
- Navigate to Take Time > Time Offs;
- Select the request you want to recall;
- Click the Recall button;
- Change the end date of the time off request as needed;
- Add a comment to explain the reason for recalling the request;
- Click Save to confirm the recall and update the request. Click Cancel to discard changes.
Working with Filters
Save time and focus on the requests that matter most! The Filter functionality in raiseR allows you to refine your view of time off requests by applying various filters. These filters help you quickly display specific requests based on attributes such as time off type, request status, position, and much more.
You can access the filter feature in two convenient locations:
- Above the requests calendar or list depending on the view selected;
- In the left menu below the Time Tracking tab.
These filters are identical and offer the same filtering options for your convenience. By default, the system shows requests with New, In Process, and Approved active statuses. The Clear All button removes all applied filters.
Great job mastering time off requests! Now, let's move on to another crucial aspect: Time Tracking requests management. Get ready to learn how to effectively manage employee work hours!