Working with Time Tracking Feature
raiseR Time Tracking feature helps you and your team effectively monitor and manage employee work hours. It ensures accurate billing, optimized project timelines, and improved workforce transparency.
Before you get started set approval workflows for time tracking in Settings → Approval Flows → Time Trackings. This establishes the approval flow, assigns approvers, and links relevant employees to specific templates (refer to the relevant article for detailed instructions). Once authorized employees submit their logged work hours, corresponding timesheets are then automatically generated and routed to the designated approvers for review.
Viewing Time Tracking Requests
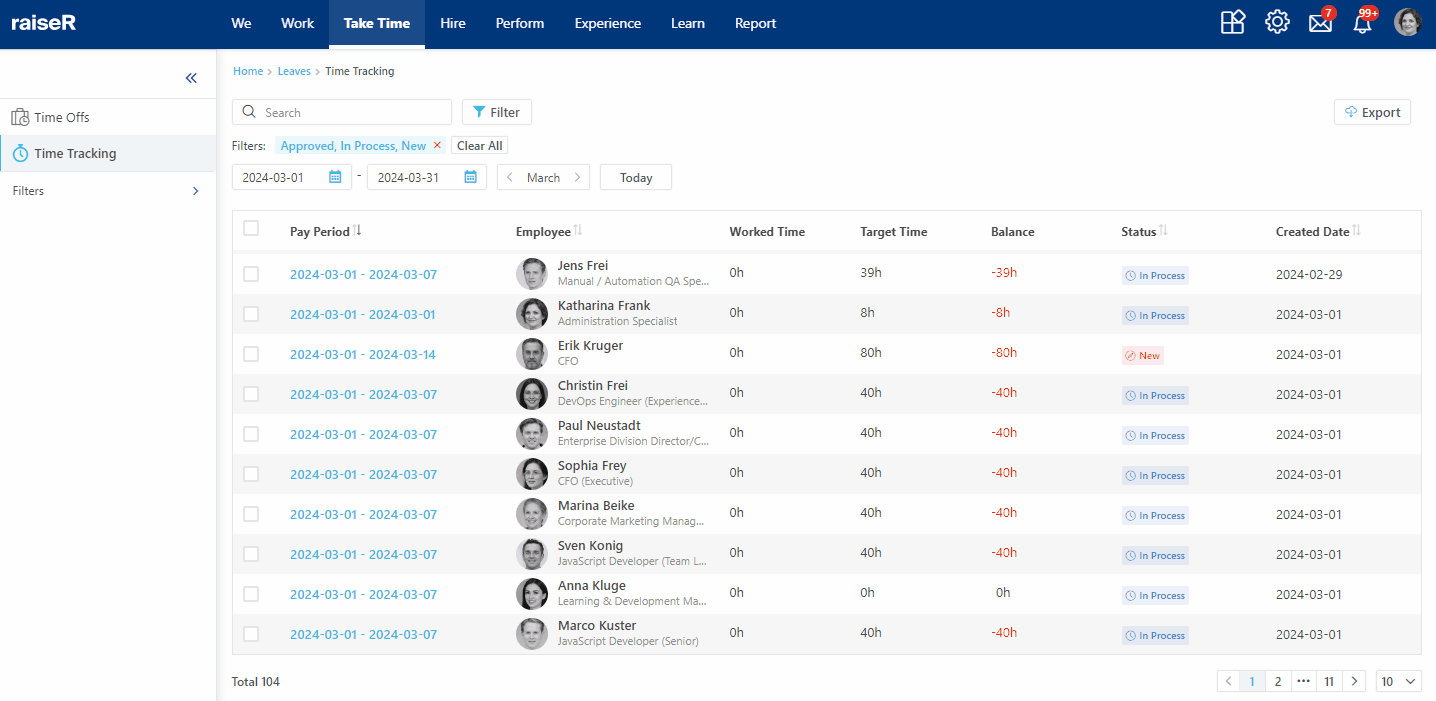
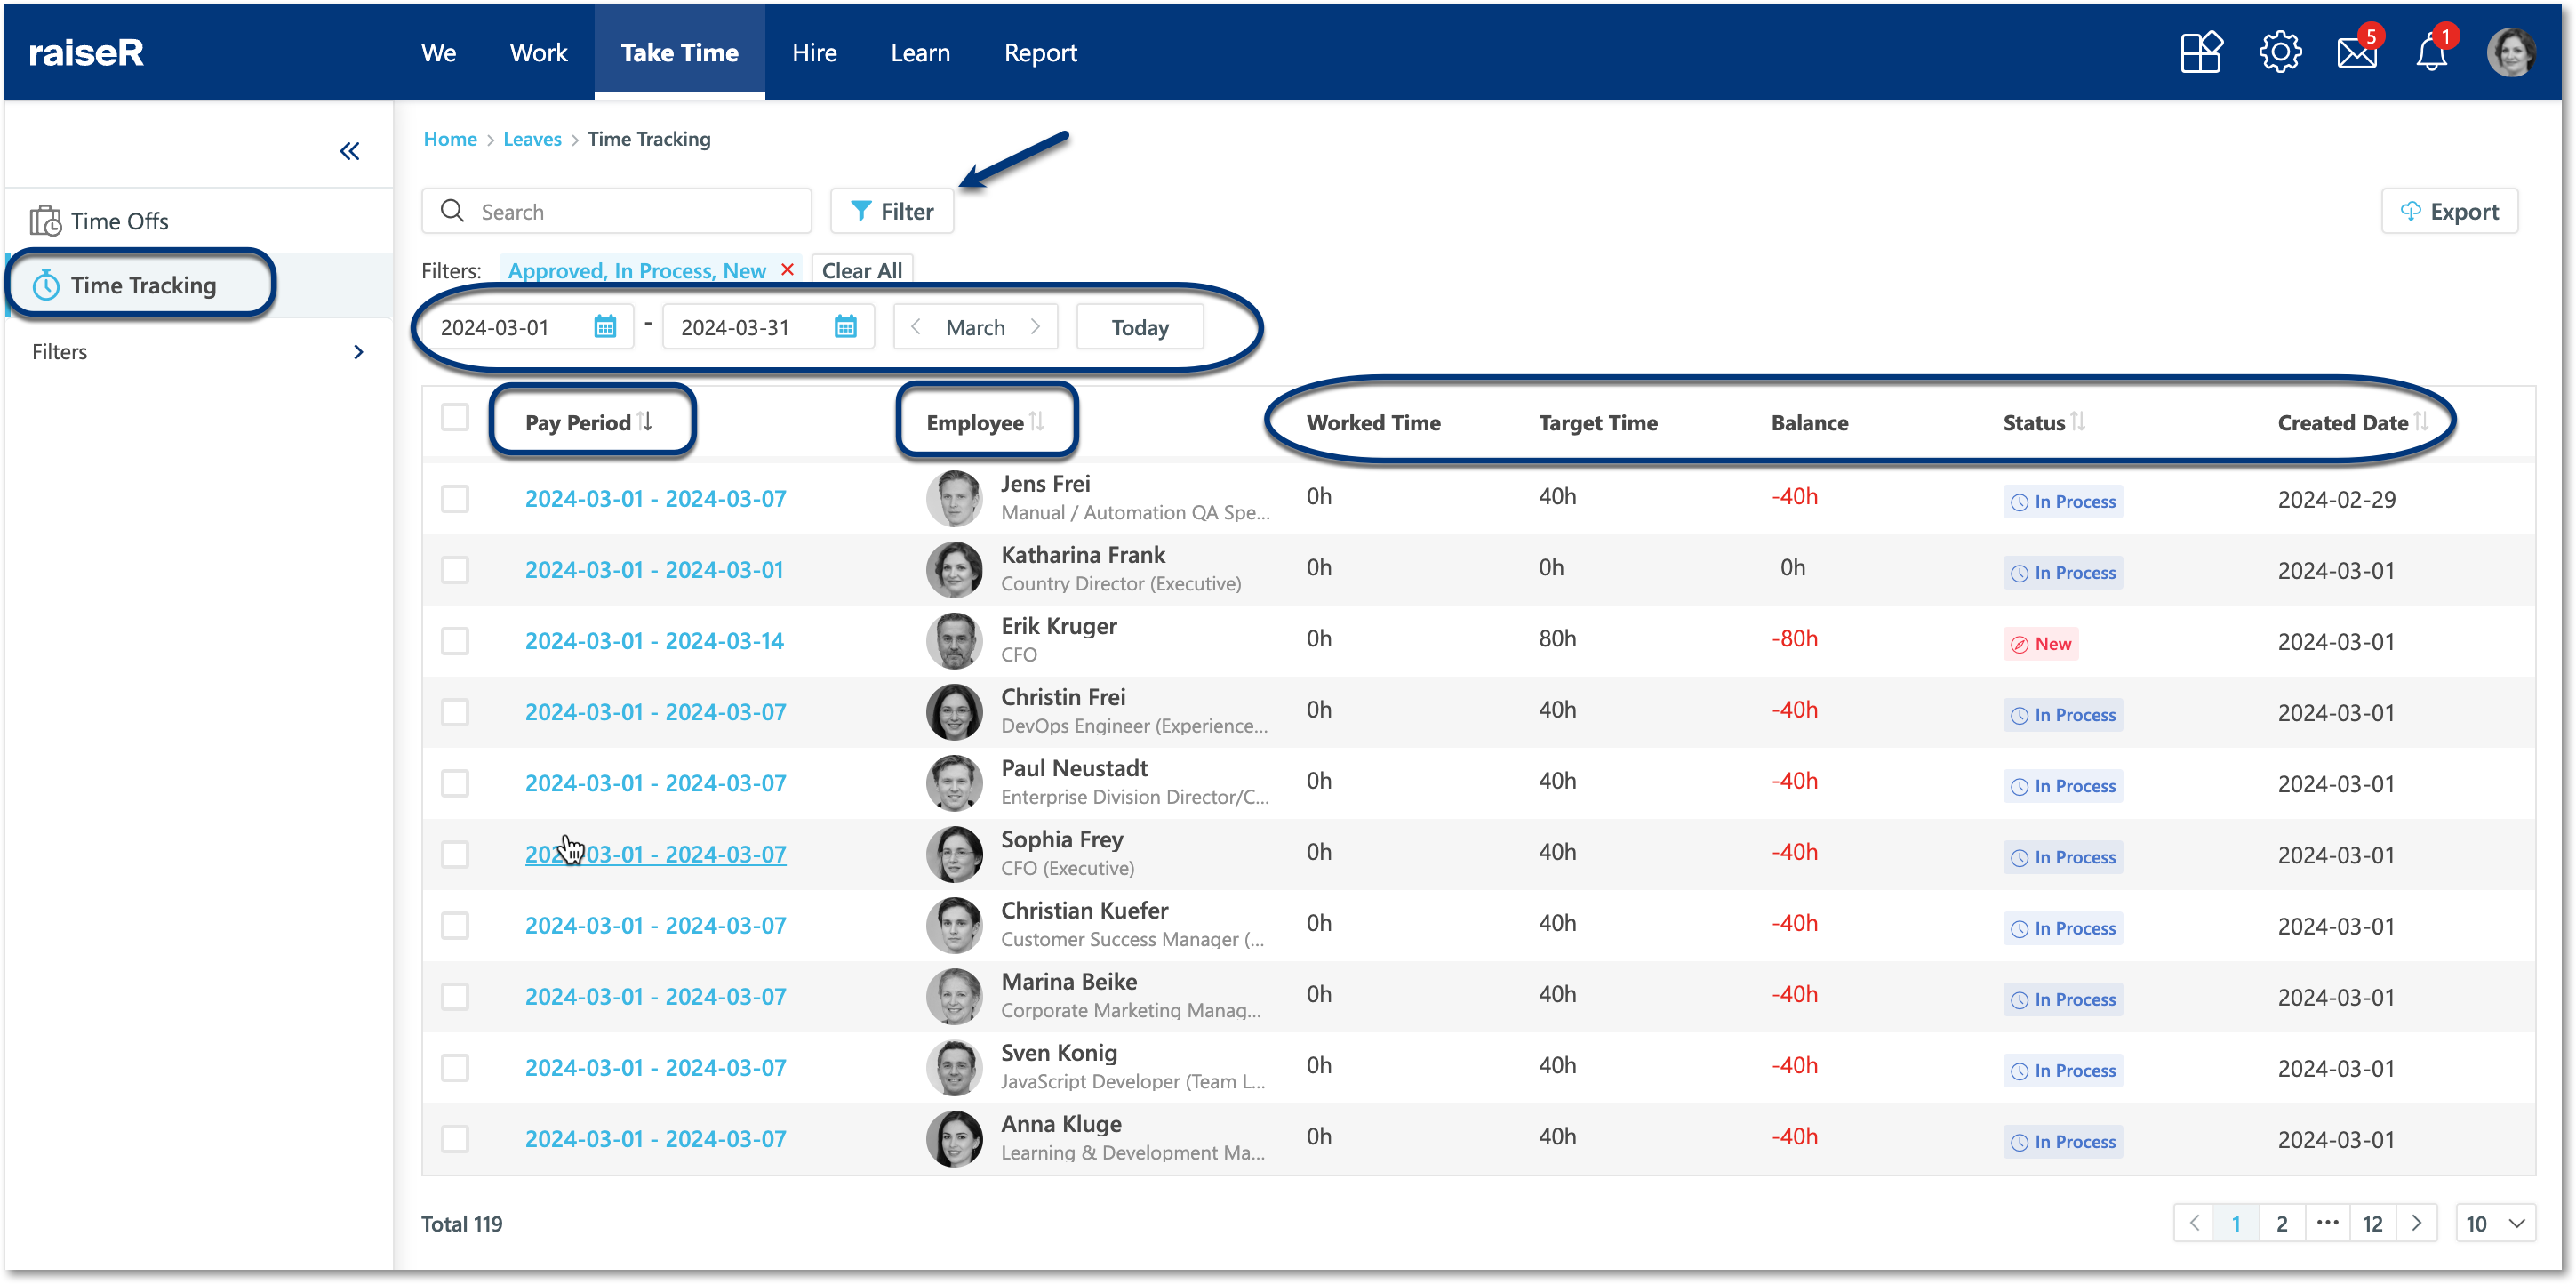
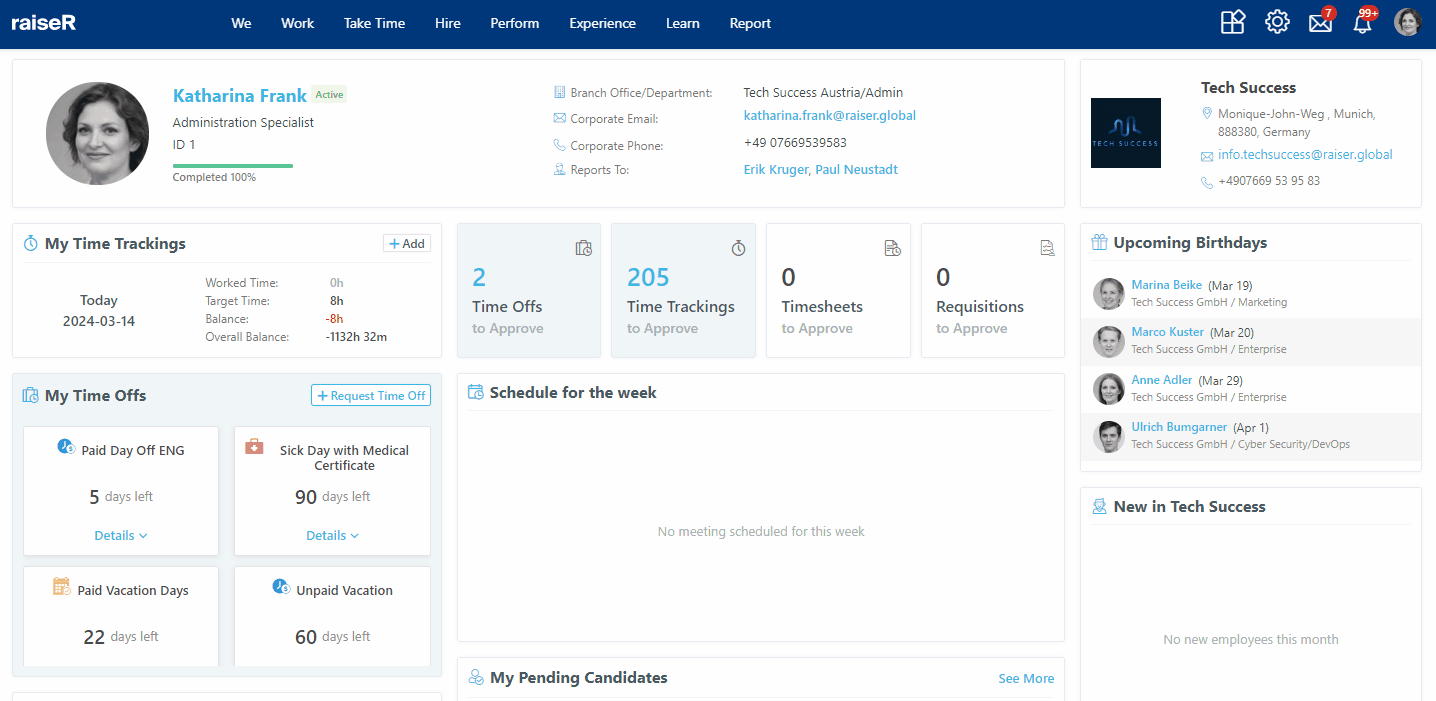
Time Tracking Requests Table
This table displays all time tracking requests for a specific pay period. Each row represents a request submitted by an employee. Here's a breakdown of the information displayed in each column:
- Pay Period: The period for which the employee's attendance is being tracked (e.g., weekly, monthly). The pay period displayed depends on the frequency chosen when setting up the approval workflow;
- Employee: Displays the employee's name, photo, position, and professional level;
- Worked Time: The total amount of time the employee has logged for the pay period;
- Target Time: The predetermined standard working hours for this employee during the pay period;
- Balance: The difference between the employee's Worked Time and Target Time. Negative balances are displayed in red for easy identification;
- Status: The current status of the time tracking request (e.g., New, In Process, Approved);
- Created Date: The exact date and time the request was submitted by the employee.
By default, the table displays requests with New, In Process, and Approved statuses. Also, You can refine the table view using the following filters:
- Date Pickers: Change the date range using the date pickers located above the table;
- Month: Use the arrows to navigate to the previous or next month;
- Today: View requests for the current date within the chosen date range.
Note: When selecting a Start Date in the date pickers, the system automatically populates the End Date based on a 12-month difference.
Example:
Today's date: 1/04/2024
You select a Start Date: 01/05/2024 (12 months from today)
The system automatically fills the End Date: 01/05/2025 (12 months after the Start Date)
Use the Export button to download a list of all time tracking requests.
Viewing Time Tracking Request Details
Click the Pay Period for a specific time tracking request to view its details.
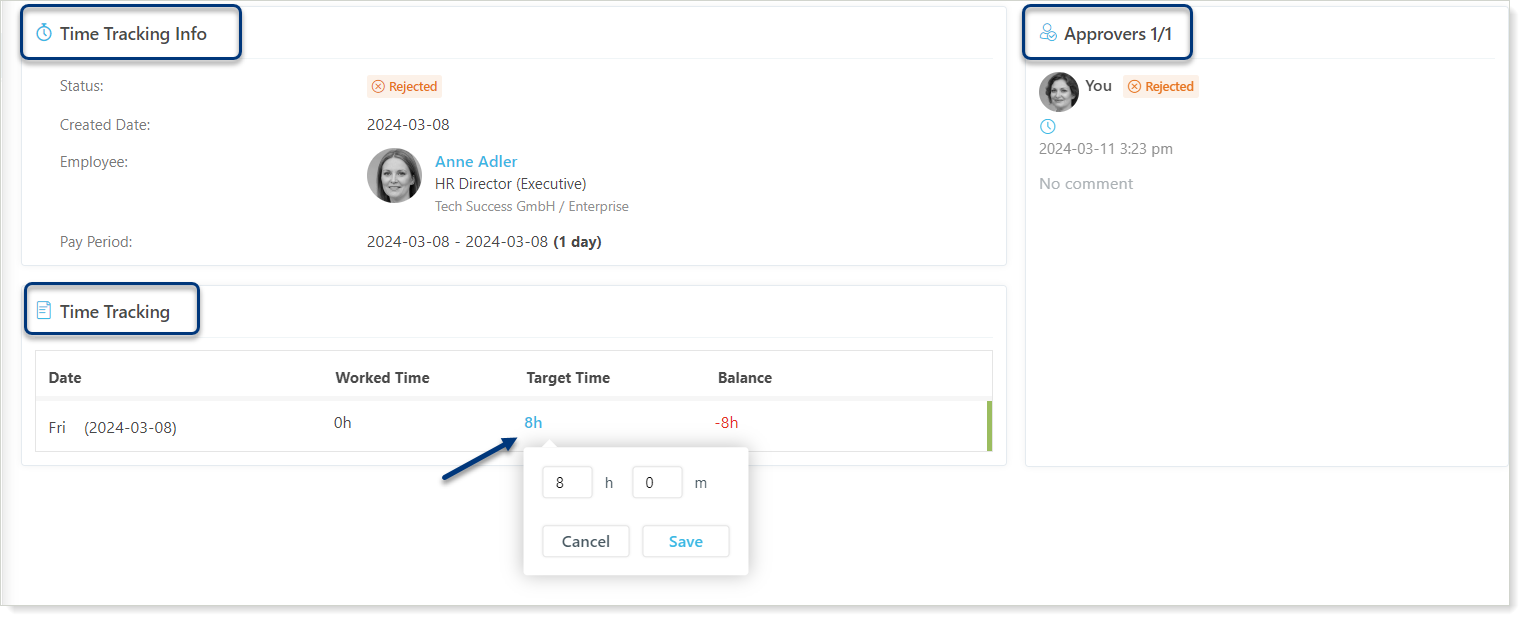
The opened page displays three sections: Time Tracking Info, Time Tracking, and Approvers.
See key information about the request, including:
- Created Date;
- Status (e.g., New, In Process);
- Employee Name (who applied), position, and professional level;
- Pay Period;
- Response Deadline shows the due date for the response. If overdue, the elapsed time appears in red (negative number).
Time Tracking
Assess the target and worked hours, along with their balance, for each day within the specified pay period. You can edit target times for each day by clicking on the record, entering a new value, and clicking Save.
Approvers
Shows the names of approvers for the request, displaying:
Number of approvers who approved/haven't approved;
- Approver Names;
- Current approval status (e.g., Approved, Pending, Skipped);
- Actions taken (e.g., Approved, Skipped Other Approvers);
- Approval Date and Time: The date and time when the corresponding action was taken by each approver.
Working with the Time Tracking Requests
Once time tracking requests are submitted, designated approvers with the appropriate user role will receive them for review. Only requests with a New status are available for approval. Each approver will only see requests that are currently awaiting their response.
Approving or Rejecting Time Off Requests
To approve or reject time tracking requests:
- Go to Take Time → Time Tracking;
- Choose a request with the New status (these are pending your approval);
- Click on the selected request to open it;
- Click the Respond button;
- You can optionally add a comment to explain your decision;
- Click Approve to grant the request or Reject to decline it.
Skipping Time Tracking Requests
As a designated approver with the appropriate permissions you can skip other approvers in a time tracking request workflow.
Steps to Skip Approvers:
- Go to Take Time → Time Tracking;
- Choose a request with the In Process status (meaning other approvers haven't responded yet);
- Click the Skip button;
- A pop-up window will appear, seeking confirmation;
- Click Skip to approve the request and bypass any remaining approvers in the workflow or click Cancel to return to the request details page.
Working with Filters
Save time and focus on the requests that matter most! The Filter functionality in raiseR allows you to refine your view of time tracking requests by applying various filters. These filters help you quickly display specific requests based on attributes such as request status, position, department and much more.
You can access the filter feature in two convenient locations:
- Above the requests table;
- In the left menu below the Time Tracking tab.
These filters are identical and offer the same filtering options for your convenience. By default, the system shows requests with New, In Process, and Approved statuses. The Clear All button removes all applied filters.