Working with Documents Categories
Categorization will allow you to efficiently organize your documents.
The Document Categories can encompass a wide range of document types, such as vacation forms, invoices, certifications, contracts, various application forms, and more. In this article, you will find a step-by-step guide to creating a document category.
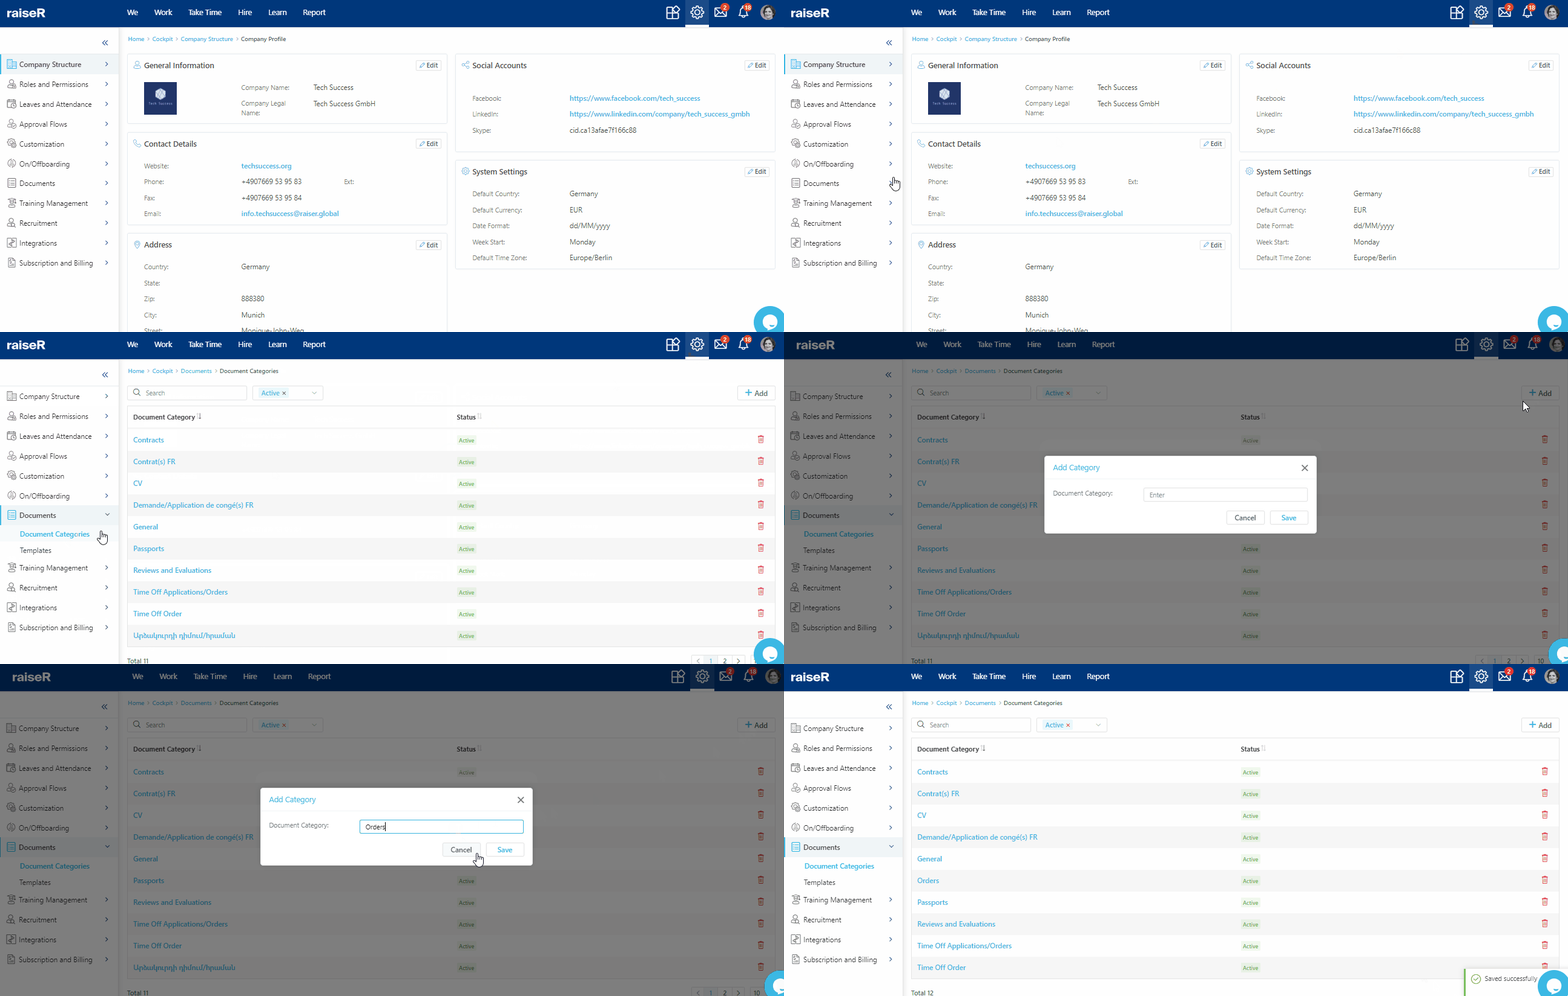
To create a document category:
- Go to the Settings ⚙ and navigate to the Documents → Document Categories section.
- Click + Add button.
- Specify the name of the category.
- Once done, click either Cancel or Save to discard or save the changes.

Additionally, if you wish to make changes to an existing category, just click on its name and make the necessary adjustments.
Note: If the Category is already associated with a document template the system will not allow to delete it. You will be able to only archive it and even restore when needed.
Congratulations on completing another important chapter of the account set-up and configuration! Stay tuned to learn how to perform Training Management within raiseR.
