Creating Branch Office Groups
Branch Office groups are created to effectively manage and organize users within an organization based on their geographical location or functional role. These groups serve several purposes:
- Access Control: Branch Office groups allow administrators to grant specific permissions and access rights to a group of users based on their branch or location. This ensures that users have appropriate access to resources, data, and functionalities that are relevant to their specific area of responsibility.
- Communication: Grouping users from the same branch or office, makes it easier to communicate with them collectively. Announcements, updates, and important information can be targeted to specific groups, ensuring that relevant messages reach the right audience.
- Reporting and Analytics: Grouping users by branch enables better data reporting and analysis. Administrators can generate reports specific to each branch, making tracking performance, evaluating trends, and making informed decisions easier.
- Customization: By creating specific groups, administrators can tailor settings and configurations to align with the specific needs of each group.
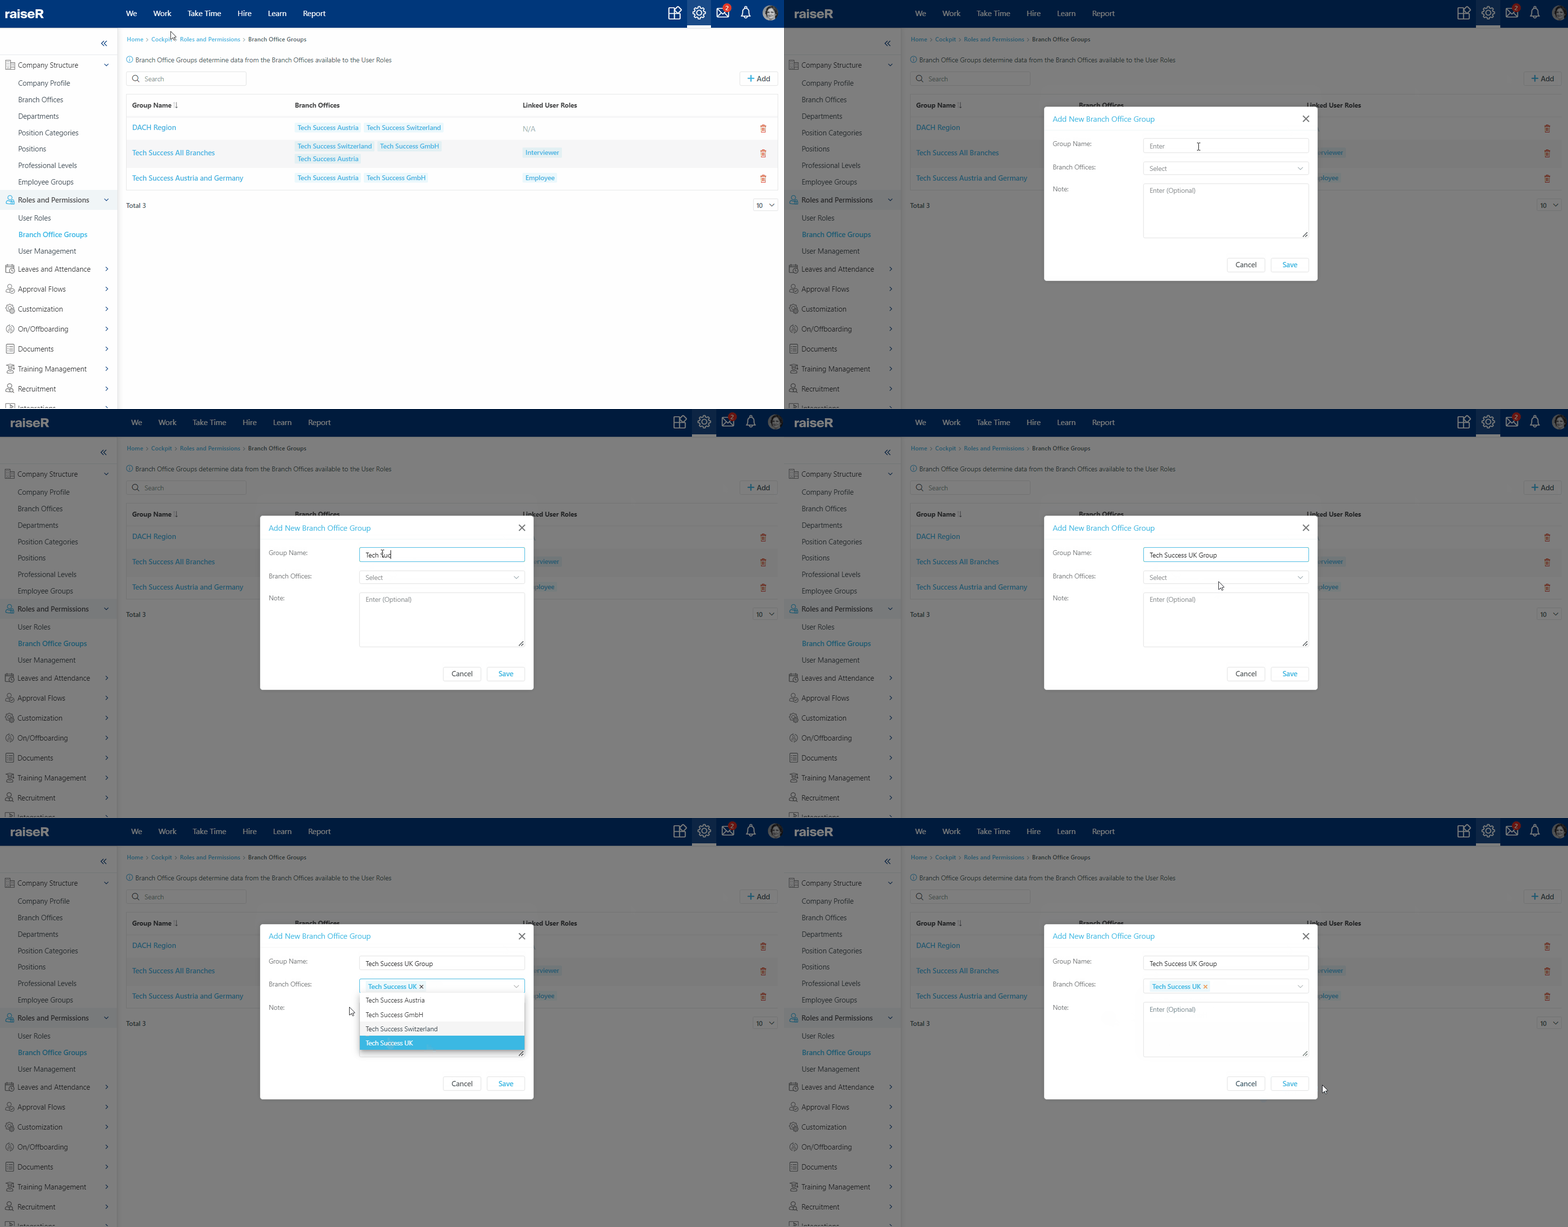
To add Branch Office Groups:
- Open the Settings ⚙ and navigate to the Roles and Permissions → Branch Office Groups section.
- Click + Add button.
- Fill in the group name and select the corresponding branches from the drop-down list.
- Once done, click the Save button.

Once you've created Branch Office Groups, you can remove them by clicking the Delete icon.
Note: Please note that a group with linked user roles cannot be deleted directly. To proceed with deletion, you must first unlink the user role(s) from the respective branch office group.
Great! With the newly created Branch Office groups, you can now enhance organization, communication, and management within your organization.
