Creating Offboarding Tasks
raiseR's users already know that we have finally released our On/Offboarding section which allows you to organize a smooth onboarding and departing processes for your employees and much more. To learn more about the recently released features hurry up to check out our Product Update Article. In order to start working with this tool you need to create tasks and templates and this article will teach you how to do that.
To create an Offboarding Task perform these steps:
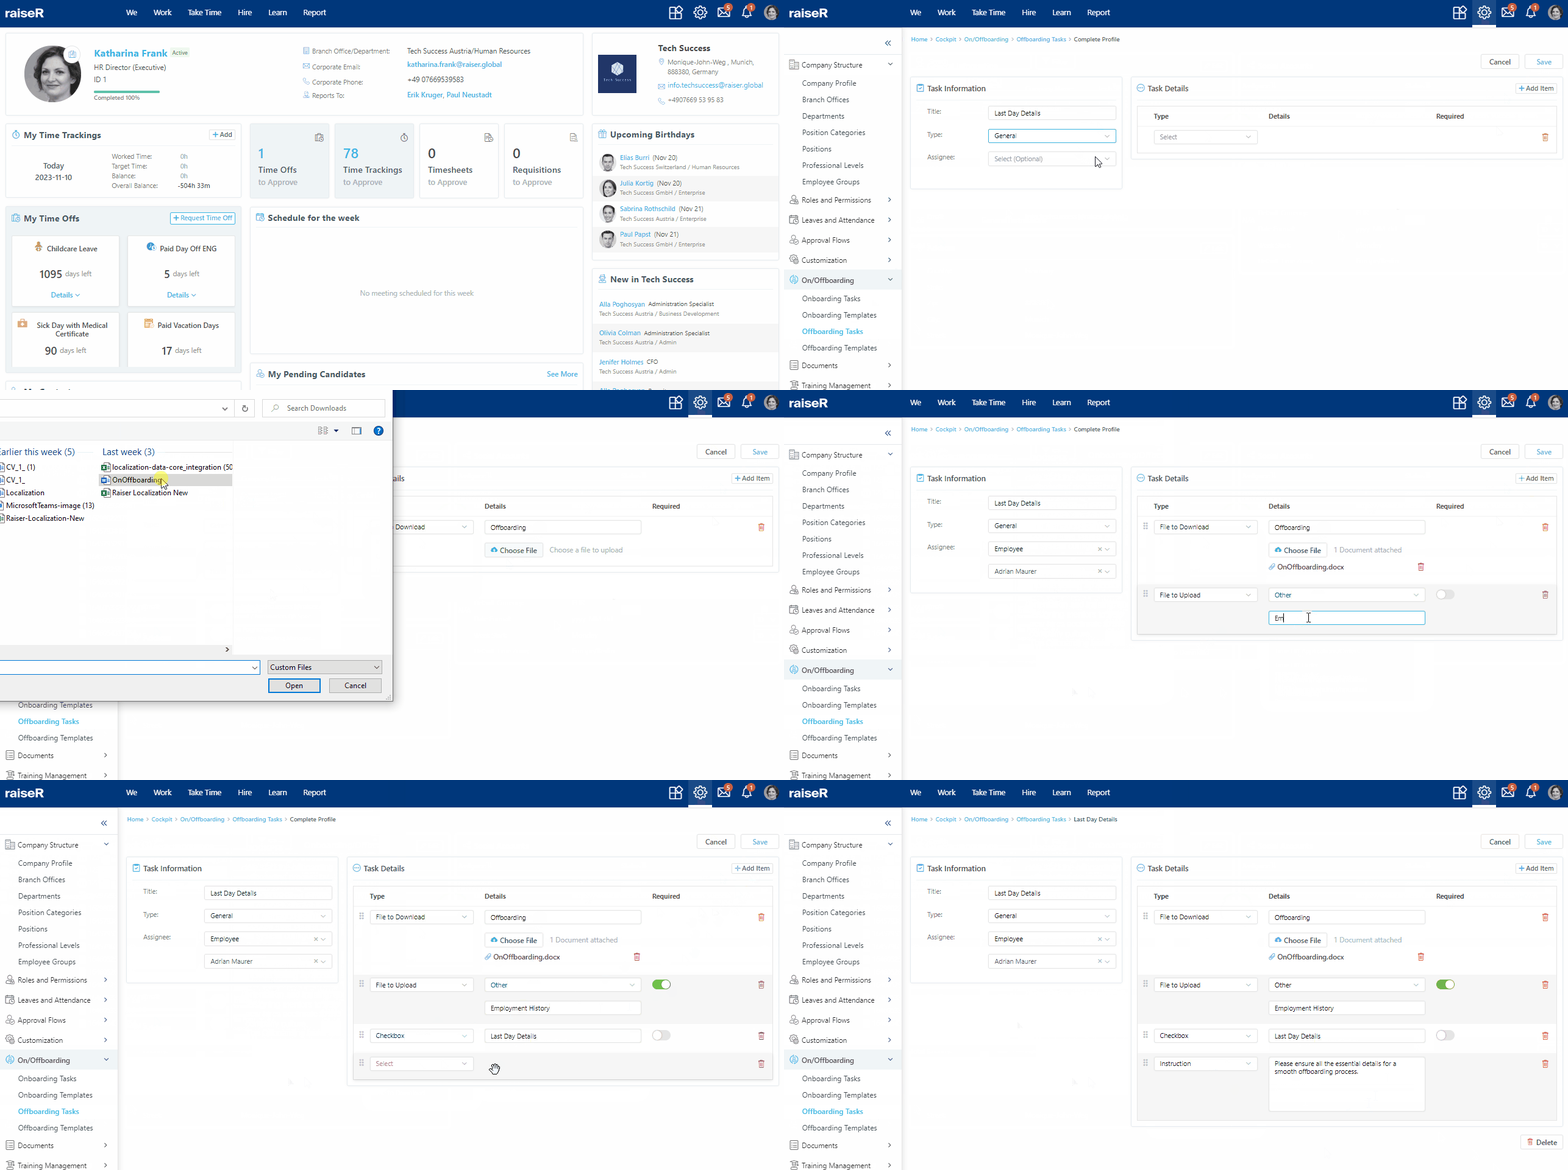
- Navigate to Settings ⚙ and open the On/Offboarding → Offboarding Tasks section.
- Click the + Add button.
- Enter Task Information:
- Title of the task,
- Type of the task:
- General: common tasks that cover a wide spectrum of activities or actions, such as setting up workspaces, providing equipment, or conducting introductory meetings.
- You can choose the assignee: Employee, Employee Group, User Role, Reports to.
- In the Task details field select the type for your task visual:
- Instruction: In the Details field enter general instructions of the task that should serve as a hint for the task assignee.
- Checkbox: Specify the title of the checkbox and make it required or optional.
- File to Upload: Here you will need to pick a Category of the file/document and enter its title to let the assignee know what s/he needs to upload.
- File to Download: Enter the title of the Document you are going to provide and browse it for your device so that the assignee can download it.
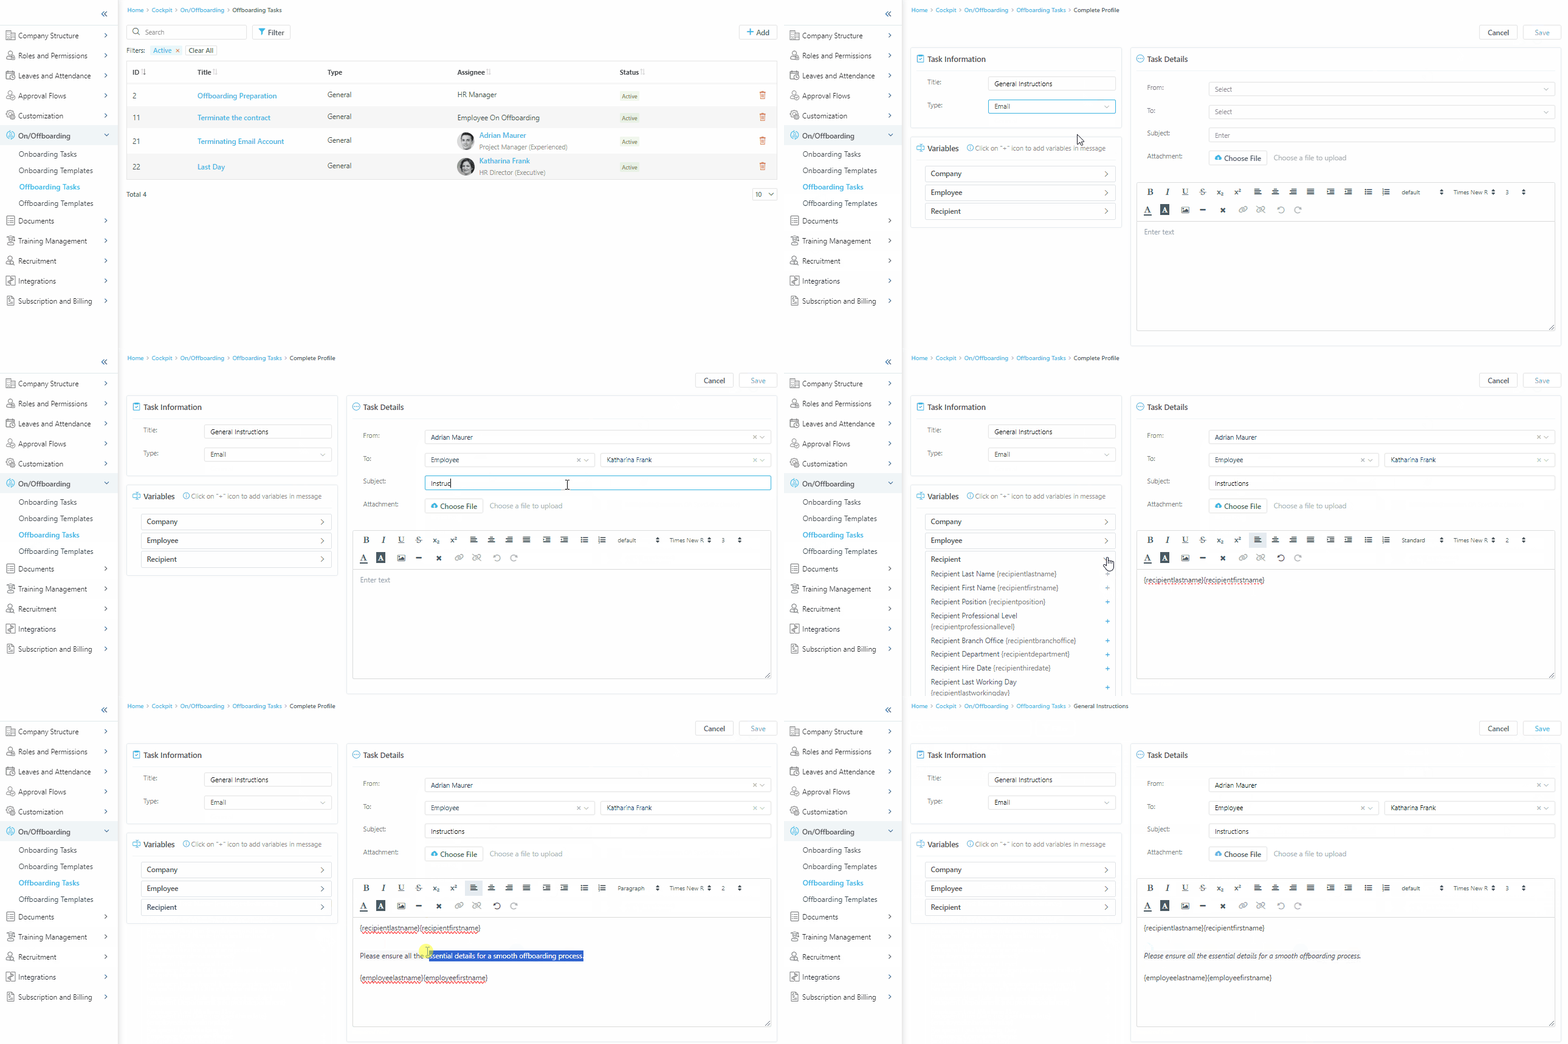
2. Email: these are the tasks that involve sending different types of emails (Farewell
email, Exit Interview Invitation email, etc.) during the offboarding process within the
recommended dates:
- In the Task Details field specify the From field, which will indicate for the recipient the name of the person who sent the email.
- In the To field, enter the recipient's email address.
- Specify the subject and add any attachments if needed.
- Finally enter the body of the email using the tools available in the editor.
- Do not forget to add Variables from Company, Employee, and Recipient to your email to make it more personalized.
Note: Please be aware that the Assignee field does not appear when selecting the Email type. The email letters will be received by the employees indicated within the email form. See below for details:


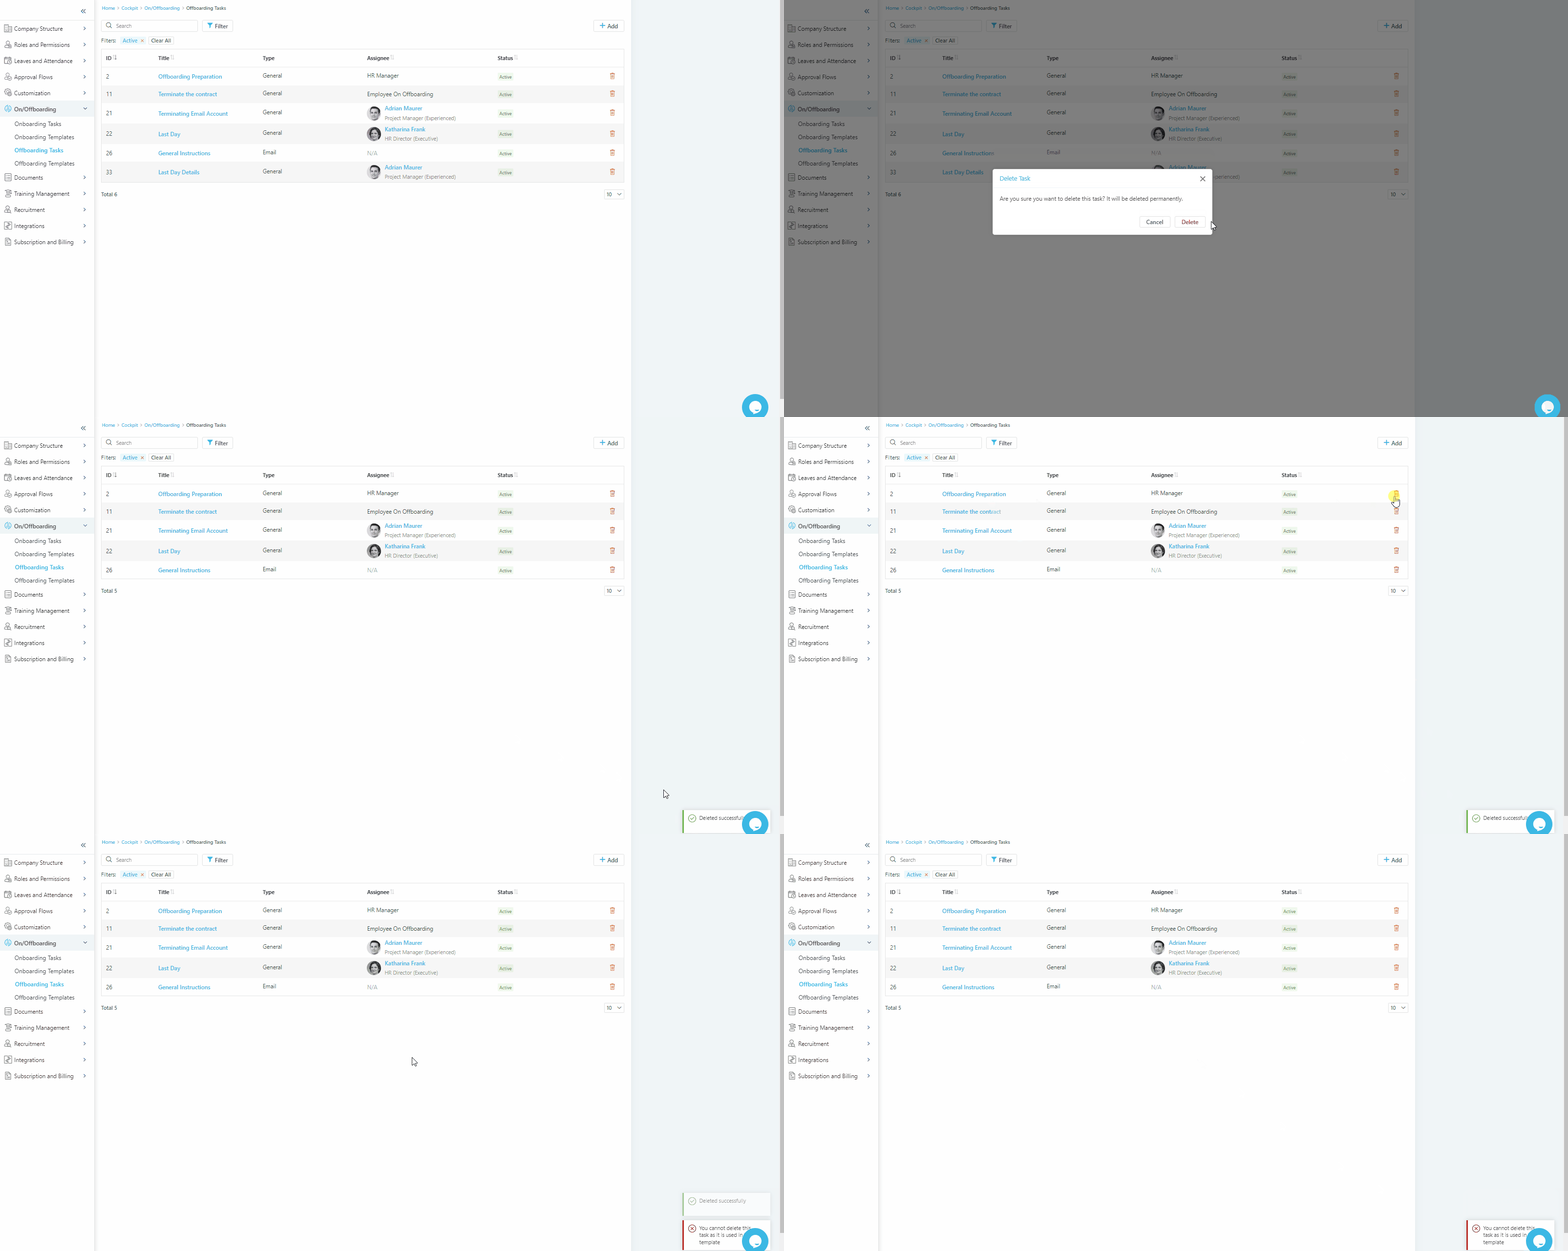
You can delete an offboarding task by clicking the Bin icon 🗑. However, it is not possible to remove a task that is used in the offboarding template.

Congratulations! You have successfully created the offboarding tasks, and you can proceed to the second step of the offboarding process configurations - offboarding template setup.
