Introduction to Resource Planner
Resource Planner tool is your one-stop shop for managing employee workloads and optimizing project assignments. See who's involved in which projects, how many hours they're dedicated to each, and identify their overall capacity.
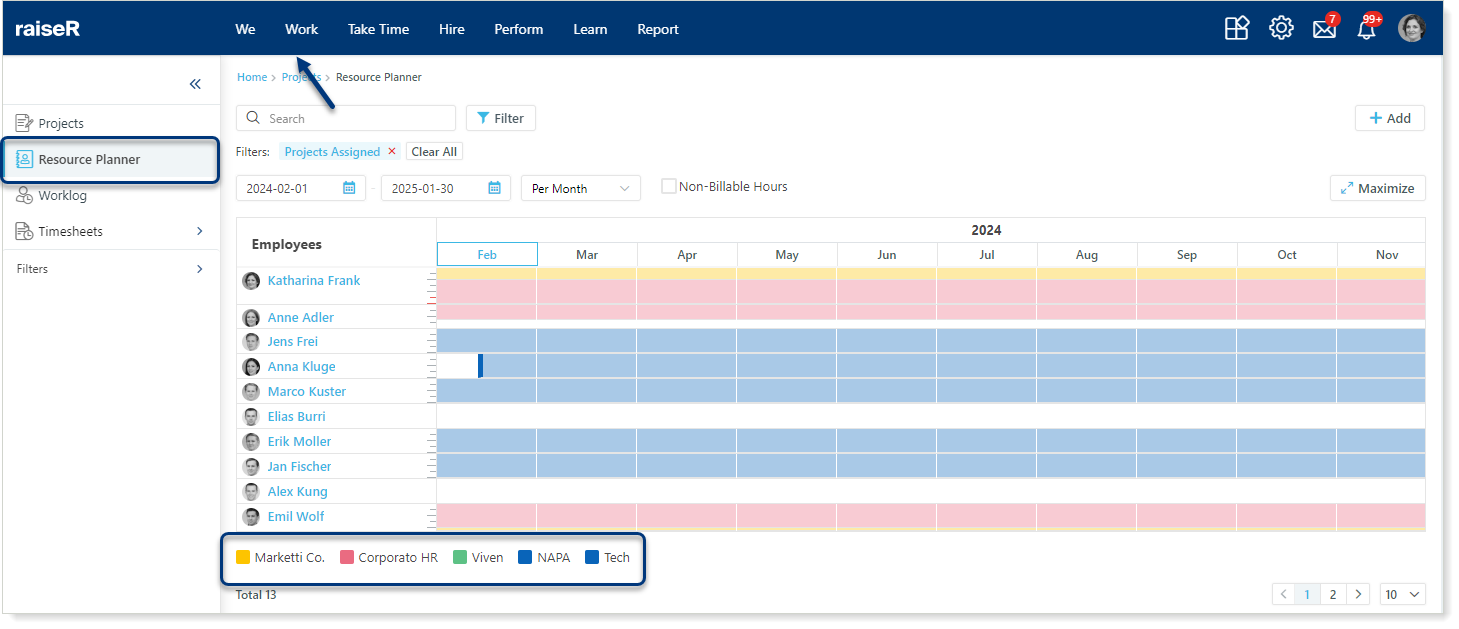
To get started navigate to Work → Projects and open the Resource Planner section:
- Colorful Calendar: Each project gets its color block, highlighting its timeline and employee involvement;
- Hover & Discover: Employee names reveal quick insights - position, project, actual and billable hours, and project dates. Click a name to explore their full profile and learn more. Click a colored row to uncover project specifics, like assigned employees, workload, and timelines;
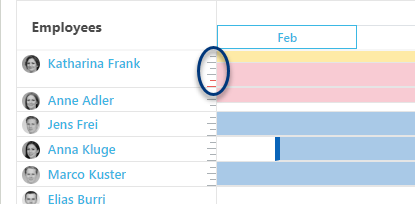
- Track Daily Progress: Tiny ticks chart individual daily hours (each tick equals two hours), with red ticks marking over time.
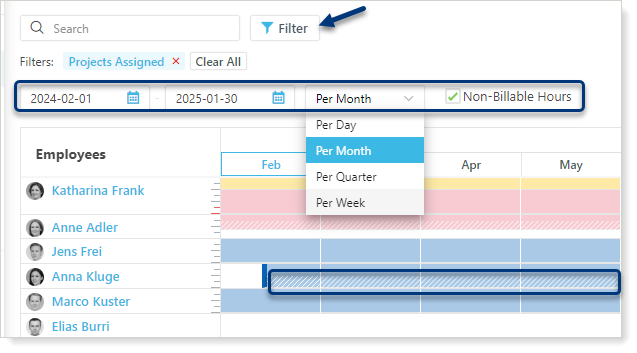
Working with Filters
Tailor your table to display exactly what you need! Use the handy filters to:
- Focus on specific details: Choose by employees, projects, types, positions, and more;
- Pick your timeframe: Select specific months using the date pickers;
- Zoom in or out: Switch between daily, weekly, monthly, or quarterly views;
- Spot non-billable hours: Quickly identify them with their unique powder pattern in the calendar.
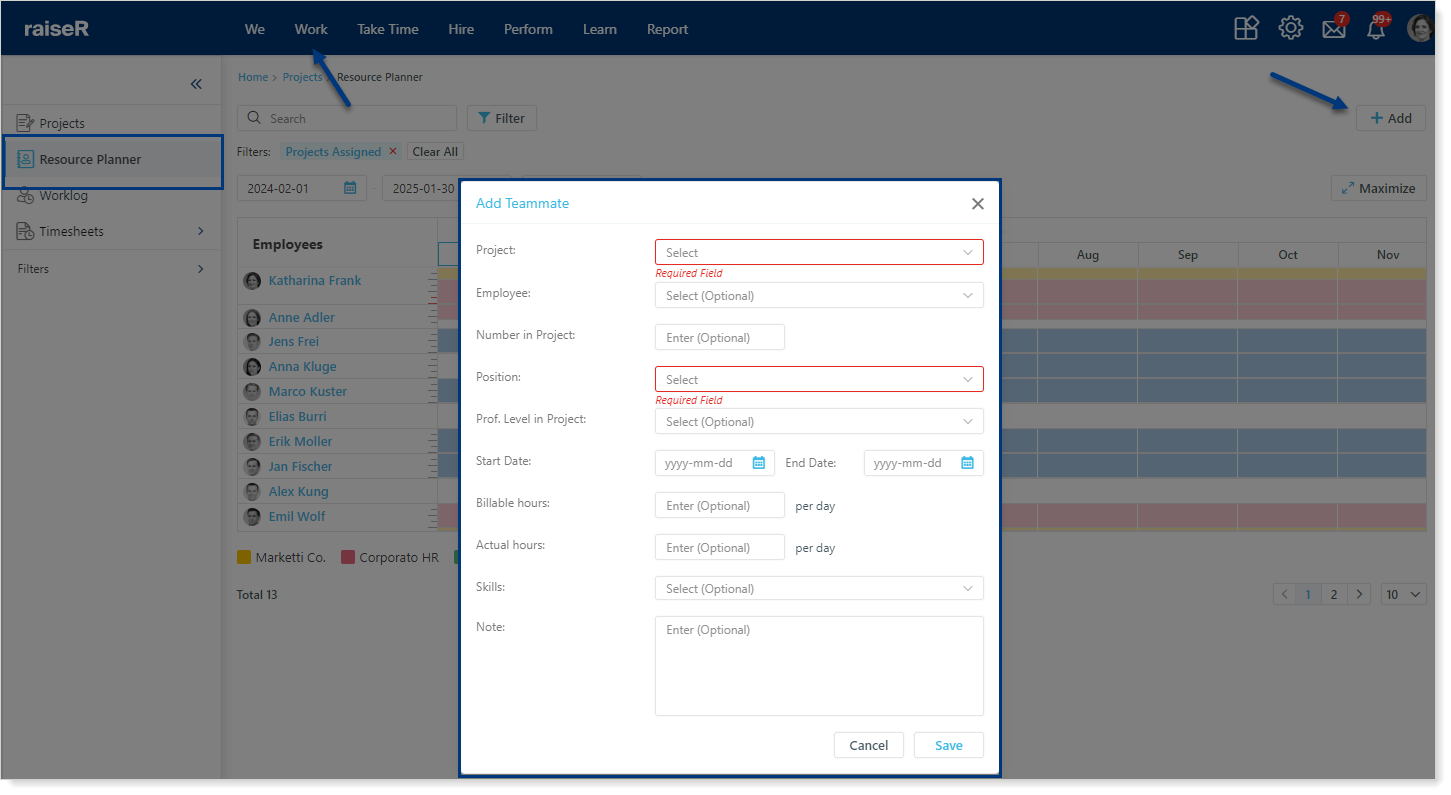
Adding a teammate
To add a teammate:
- Navigate to Work → Resource Planner;
- Click the + Add button;
- Select a project;
- Choose the perfect person for the project from the drop-down list;
- Specify their counting number in the project;
- Select the Position;
- Choose the level for the position you are seeking for this project (junior, mid, or senior);
- Use the date pickers to set the project start date;
- Use the date pickers to set the project end date;
- Enter the expected billable hours per day;
- Set the anticipated daily work hours;
- Select the skills they possess that align with the project needs;
- Note: Share any additional notes or details here;
- And finally, click Save to add your teammate to the project.