Creating and Working with Projects
The Projects section is your central hub for managing all your ongoing initiatives. Here you can easily add new projects, assign team members, filter the list to focus on what's most important, and even export data for further analysis. Access it easily by navigating to Work > Projects.
Projects can be viewed in two modes: Card and List.
Projects Card View
Gain valuable insights at a glance with Card View, displaying key information like:
- Project status and logo;
- Client company name;
- Start and end dates;
- Project owner;
- Billable/non-billable hours;
- Team member photos;
- Project color for quick identification.

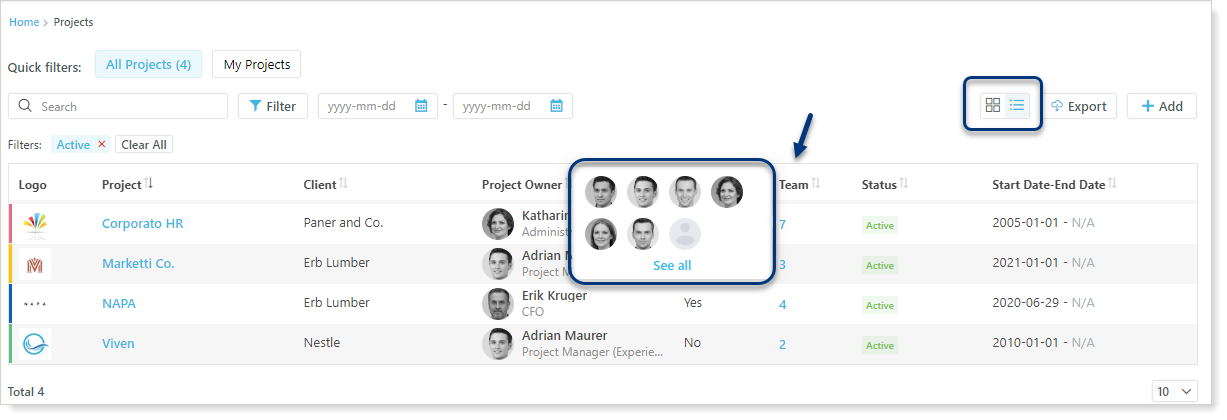
Projects List View
Prefer a detailed breakdown of your projects? Switch to List View with a click! Here, you'll find everything from Card View (status, logo, dates, etc.) plus a bonus:
- Click the team number to see photos of everyone involved. Hover over a photo for a quick peek at their position;
- Want to see the whole team? Click See All!
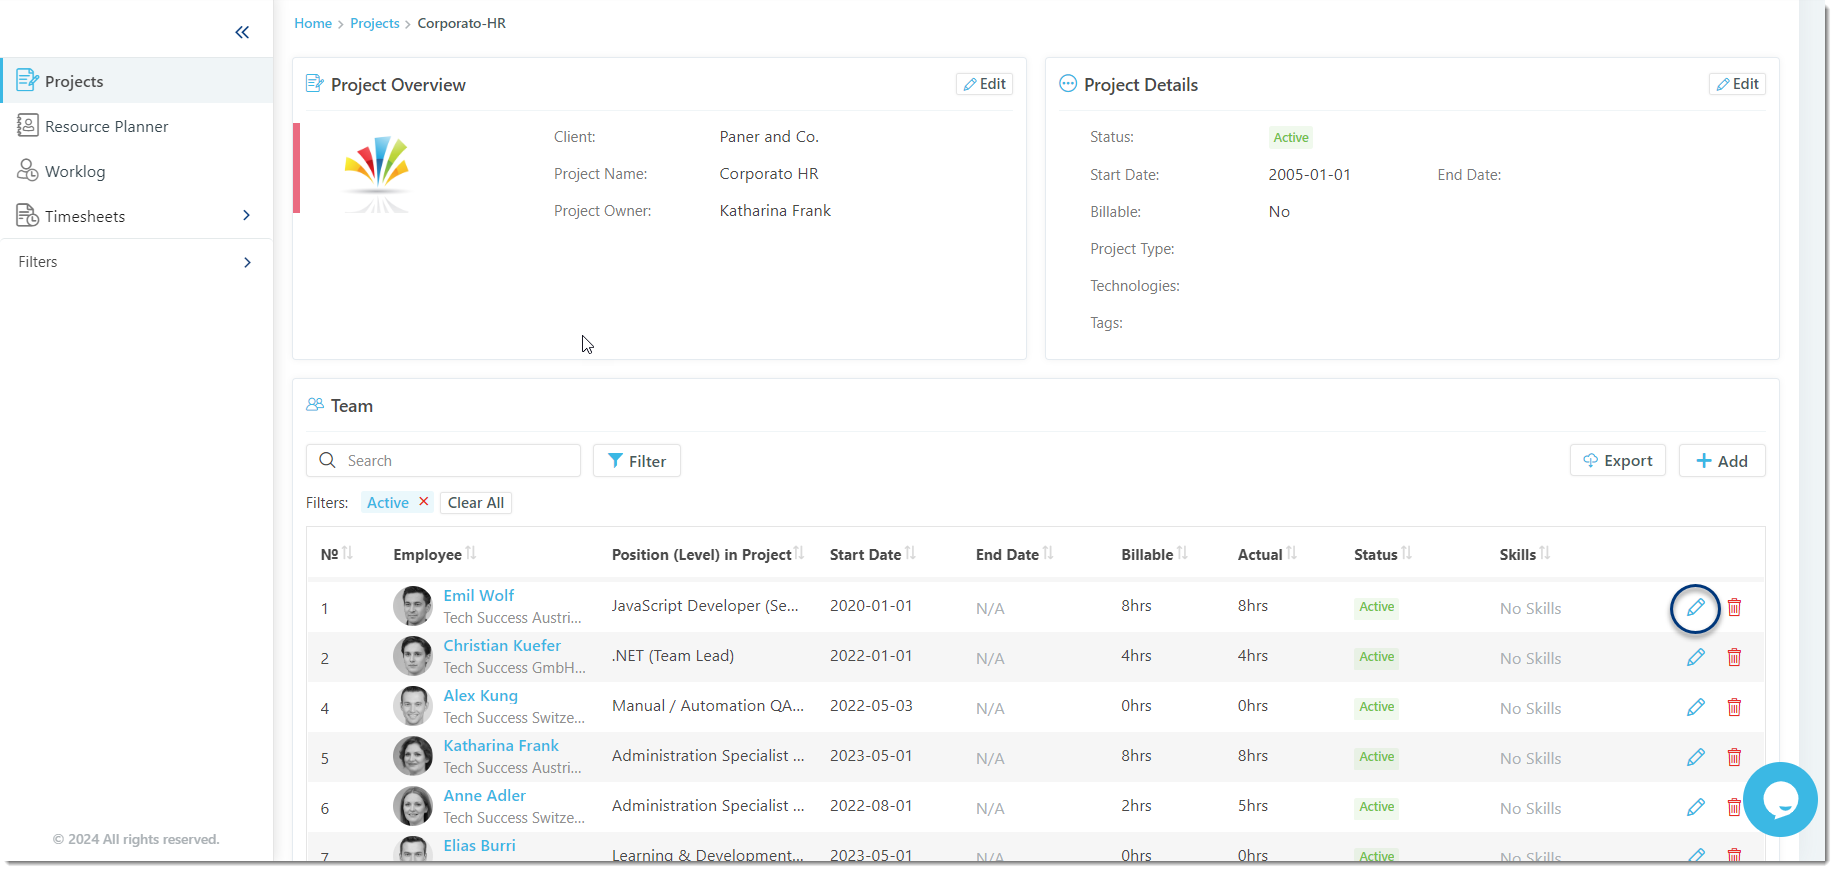
Click the View link in Card View or the project name in List View to access detailed information about projects, progress, and more. Need data for reports or sharing? Simply export it with a click.
Note: By default, only active projects are shown. Filter the list to see other statuses.
Tip: Project Statuses are:
- Active: These projects are up and running, with clear start dates and ongoing work;
- Archived: These projects have been completed and tucked away for future reference;
- Closed: The projects have reached their end dates and are officially complete;
- Non-defined: These projects are waiting for their starting signal;
- Upcoming: The projects haven't officially started yet, but their start dates are approaching.
Working with Filters
You can easily filter projects based on:
- Period: Use the Date Pickers. Set the desired dates to view projects within that timeframe;
- Quick Filters: See All Projects or My Projects by selecting the corresponding button.
Tip: All Projects displays all registered projects in the system, while My Projects shows projects where you are the owner.
Important! To see All Projects and My Projects buttons you'll need the right permissions. Check your Settings to see if you have it. (Click here for details).
Creating New Projects
To create a project, follow these steps:
- Navigate to Work → Projects;
- Click + Add button;
- You will be taken to a new page where you will need to enter the Project Overview, Project Details, and Team.
Project Overview
- Select your client from the list;
- Give a descriptive project name that captures its essence;
- Assign the project owner;
- Add a comment describing the project in the text box. Use the HTML editor to format and style your text for extra overview;
- Click Save to add the project and proceed with filling in the Project Details or select Cancel if you need to rethink things.
Project Details
- Status: This reflects your project's stage based on its start and end dates;
- Start Date: Mark the official launch date of your project;
- End Date: Set the day your project wraps up;
- Billable: Switch the toggle on if the project is billable;
- Project Type: Select a project type(s) from the suggested list;
- Technologies: Select the skills needed for the project;
- Tags: Add relevant tags to help categorize and search for your project:
- You can choose multiple options for types, tags, and skills
- Click Save to continue filling in the Team section.
Tip: Find the predefined options of the project types, tags, and skills in the Settings → Customization → Key Properties.
Team
- Employee: Choose the perfect person from the dropdown list;
- Number in Project: Specify their counting number in the project;
- Position: Select the Position;
- Professional Level in Project: Choose the level for the position you are seeking for this project (junior, mid, or senior);
- Start Date: Use the date pickers to set the project start date;
- End Date: Use the date pickers to set the project end date;
- Billable hours: Enter the expected billable hours per day;
- Actual hours: Set the anticipated daily work hours;
- Skills: Select the skills they possess that align with the project needs;
- Note: Share any additional notes or details here;
- And finally, click Save to add your teammate to the project.
Use the handy icons to edit or delete team member information.
Note: While deleting projects isn't an option, you can archive them to keep things tidy. But before you do, make sure no resources are still assigned to the project. You can easily restore them later if needed.