Creating and Managing KPIs
Important! Before diving into KPI creation, take a few minutes to configure essential settings. Our guide will walk you through setting up strategic perspectives, data sources, approval workflows, and notifications.
Key Performance Indicators (KPIs) are the guiding lights for any organization seeking to measure success and achieve strategic objectives. This article will help you define and manage KPIs effortlessly.
Creating KPIs:
- Navigate to the Perform module, locate the KPI section, and access the Manage subsection.
- This is where you'll establish and manage your KPIs
- Click the + Add KPI button to initiate the KPI creation process
- This will open a new window where you can define the specifics of your KPI
- Define Your KPI:
- Title: Assign a clear and concise title that accurately reflects the KPI's purpose
- Description: Provide a detailed explanation of the KPI, outlining its objectives and how it aligns with your overall strategy
- Linkage: Specify how this KPI connects to your organizational structure. You can designate it to a particular department, team, or individual
- Strategic Perspective: Categorize your KPI based on a pre-defined set of strategic perspectives within your organization
- Source: Indicate the data source that will be used to track the KPI's performance.
- Department: Assign this KPI to a specific department
- Type: Use the dropdown menu to select either Individual or Group depending on what your KPI is measuring
- Owner: Assign the primary responsibility for managing and tracking the KPI using this dropdown menu
- Contributors (Optional): This dropdown menu allows you to designate individuals who might contribute to or have a stake in the KPI, even if they aren't the primary owner
- Measurement: Establish the specific metric used to quantify the KPI and set notification rules to receive alerts for your KPI
- KPI Metric: Select the unit used to measure this KPI's value (number, percent, currency.
- If you choose a currency, specify the exact currency used (e.g., USD, EUR)
- Good When: Indicate whether the KPI value is considered positive when it increases or decreases
- Target: Choose either a Fixed or Formula option
- Fixed: Enter a specific numerical value as the target you want to achieve
- Formula: Define a dynamic target based on a baseline value and a percentage change
- Increase by: Specify the percentage by which you want the target to increase or decrease from the baseline value
- Thresholds: Set optional threshold ranges to define acceptable performance levels. For example, you could set a Success zone for exceeding the target, an Average zone for meeting expectations, and a Fail zone for falling below the acceptable range
- Frequency: Select how often you want users to review and track the KPI data. (monthly, quarterly, or annually)
- Reminder on Check-in: Set the periodicity for reminder notifications
- Reminder Before Frequency End: Set a reminder notification for a specific number of days before the end of the selected frequency period. For instance, if the frequency is monthly, you could set a reminder 3 days before the end of the month to prompt data entry or review
- Approval Required: Turn a toggle switch on to indicate that this KPI requires approval from someone before the data is finalized. When you switch it on, an additional field called Approval Flow will become available
- Approval Flow (if Approval Required is on): Select the specific approval workflow that needs to be followed for this KPI. If no existing flows are defined, click here link to create a new one.
8. Click:
- Save to permanently store your KPI configuration
- Save as Draft to temporarily save your progress on configuring a KPI
- This allows you to return and complete it later. The KPI won't be available for tracking until formally saved
- Cancel to discard any entered information
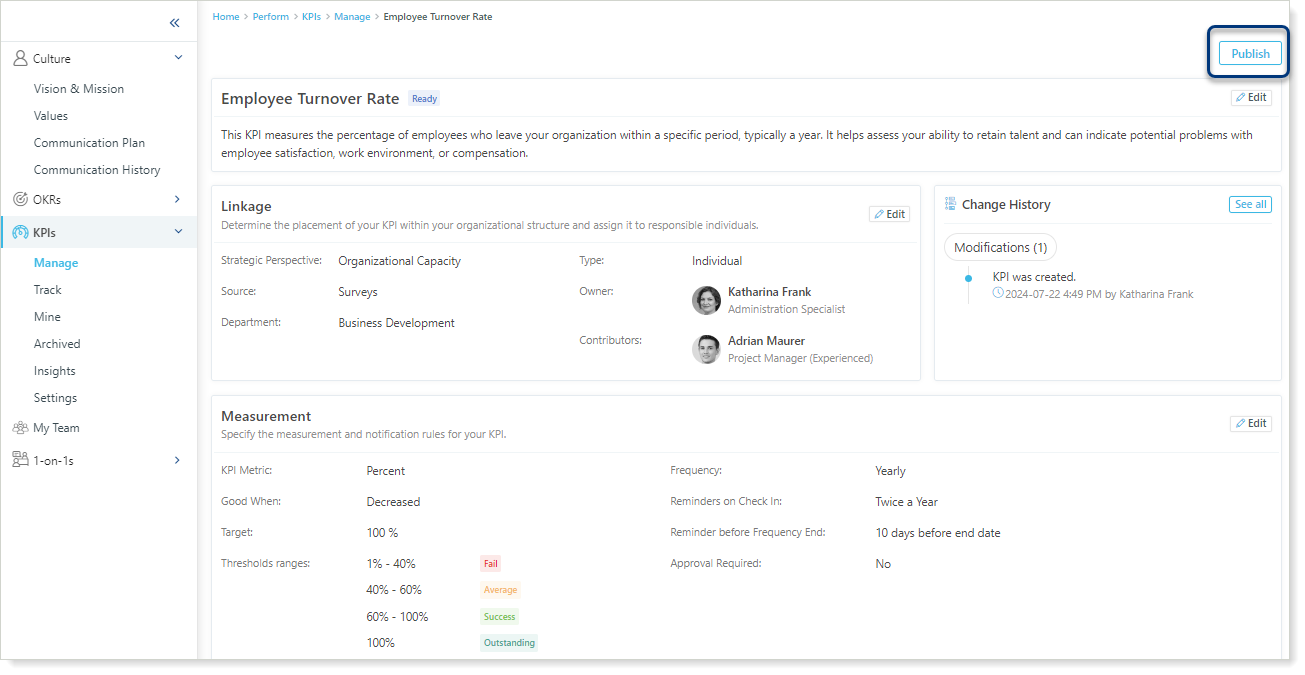
Once you've finalized your KPI configuration, here's what you need to do:
- Publish (if no approval is required): If your KPI doesn't have an approval flow assigned, click Publish to activate it and start tracking data immediately.
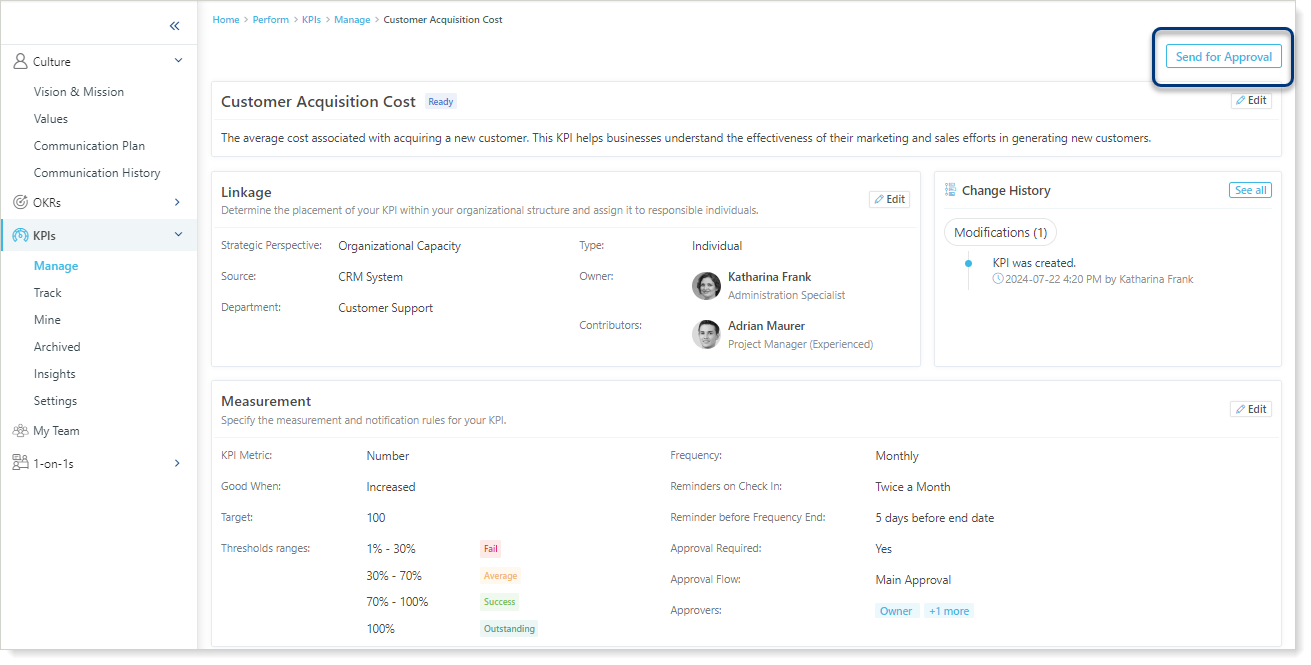
Tip: Use the Actions menu to create copies of existing KPIs, remove unnecessary KPIs, submit KPIs for review and approval.


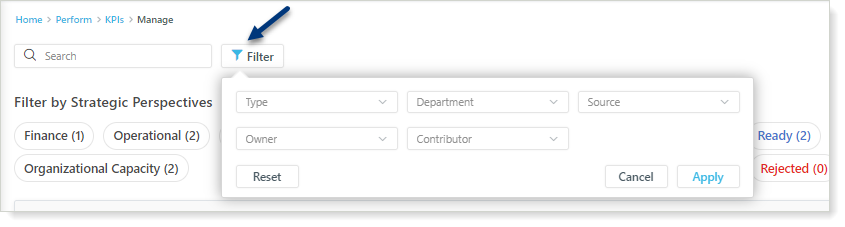
Filter Your KPIs
After creating KPIs, use the available filters to narrow down your view and quickly find specific KPIs based on their Strategic Perspective or Status.
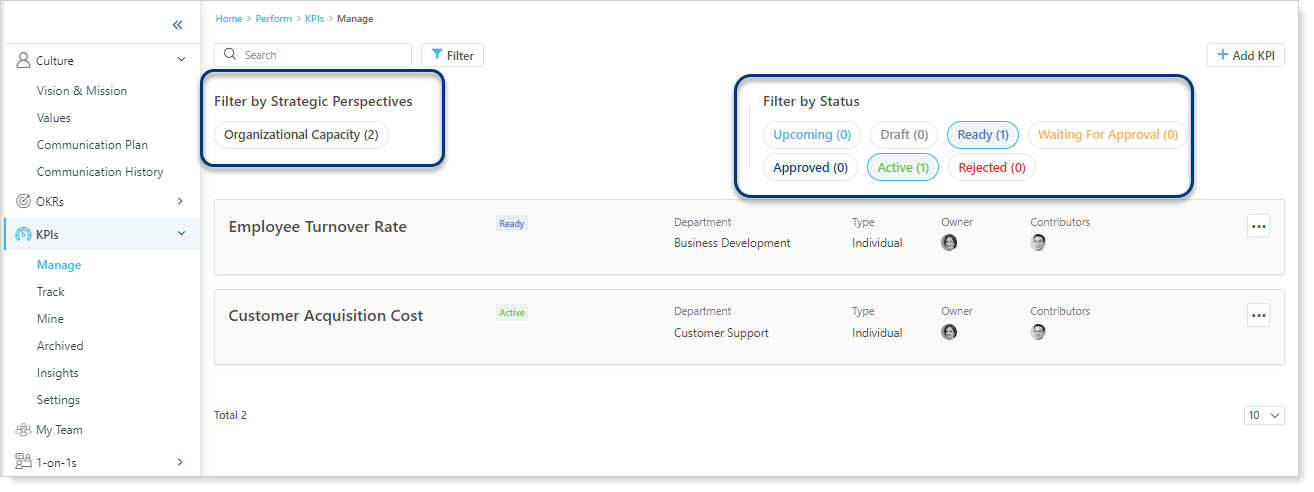
Understanding KPI Statuses:
- Upcoming: KPIs with a start date in the future
- Draft: Saved KPIs awaiting finalization
- Ready: KPIs with all required fields completed and saved
- Waiting for Approval: KPIs awaiting review and approval from designated reviewers
- Approved: KPIs that have been approved by reviewers
- Active: KPIs that have been published and are currently in use
- Rejected: KPIs that have been rejected by reviewers
In addition to Strategic Perspective and Status, you can also filter your KPIs by:
- Type
- Department
- Owner
- Contributor
- Source
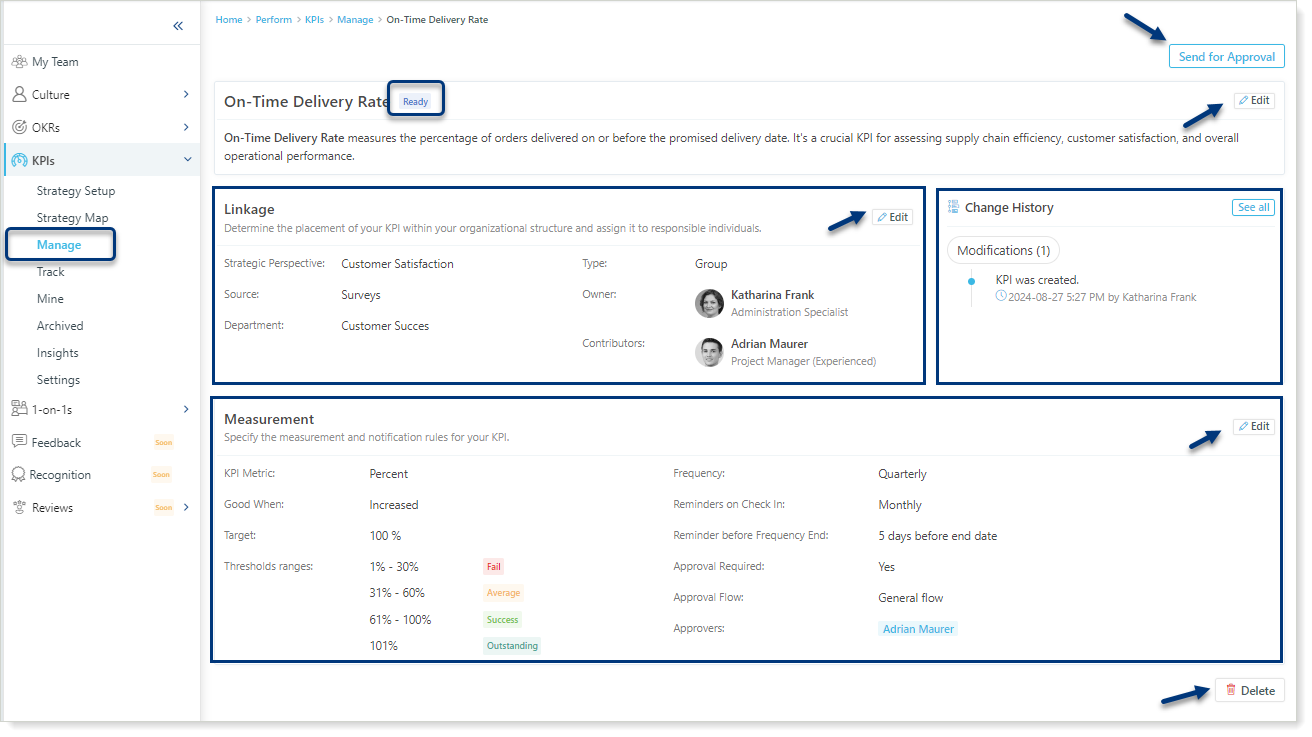
Accessing and Managing KPIs
To view detailed information about a KPI, click on its name within the Manage section. You'll find information organized into three sections: Linkage, Measurement, and Change History.
- Linkage: View the KPI's placement within your organization, see who is responsible for the KPI
- Measurement: View the specified measurement method, review the configured reminder and alert settings
- Change History: View a record of all changes made to the KPI
Key Actions:
- Delete: Delete unpublished KPIs
- Archive: Archive published KPIs for future reference
- These KPIs will be stored under the Archived section of the KPIs
- Edit: The Edit option allows you to make changes to existing KPIs (except for Active KPIs). You can modify various aspects, including: Name, Description, Measurement, Linkage.
- Send for Approval: See above
- Publish: See above
You did it! Now that you're a pro at creating and managing KPIs, dive deeper into the next sections to unlock even more valuable features.